WordPress is a free, open-source website creation platform.
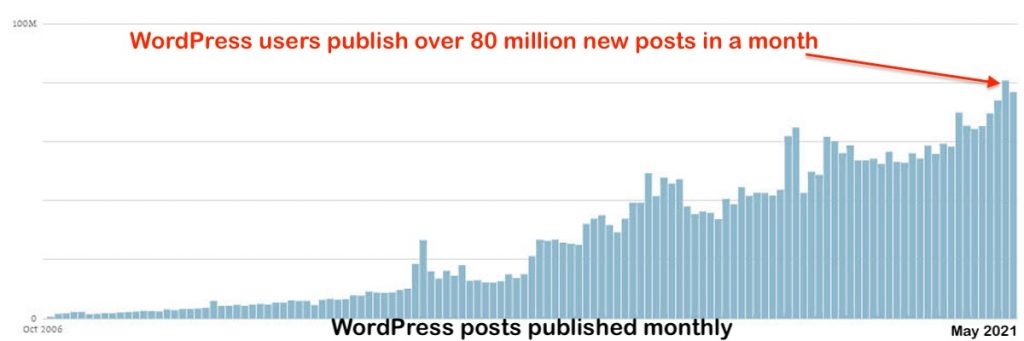
There are an estimated 64 million websites currently using WordPress.
Over 400 million people visit WordPress websites every month.
661 new WordPress sites go live each and every day.
There are over 50,000 plugins available to enhance your WordPress website.
WordPress is available in 57 different languages, making it a truly global platform.
Click to the top of page
JCCAA Website Policy Statement
We advise all website users to be prudent and diligent, and take the necessary precautions and measures to comply with the JCCAA bylaws while utilizing JCCAA website to share or post information and materials about our organization or member organizations.
We urge all website users to keep away from those topics, contents or materials that are sensitive, controversial or inappropriate in nature such as but not limited to politics, religions, races, etc., which may result in discord, disruption, animosity or hostility within our organization or among our members.
We reserve the right to remove those publications that are deemed unsuitable in accordance with the above policy and to terminate the publishing privileges of those users that do not adhere to our policy.
For each JCCAA alumni web developer, please email your draft post title to: web.committee@jccaa.org by Wednesday. Then JCCAA web committee will publish your draft post on the following Friday. If you have any question about JCCAA website development, please also email to web.committee@jccaa.org.
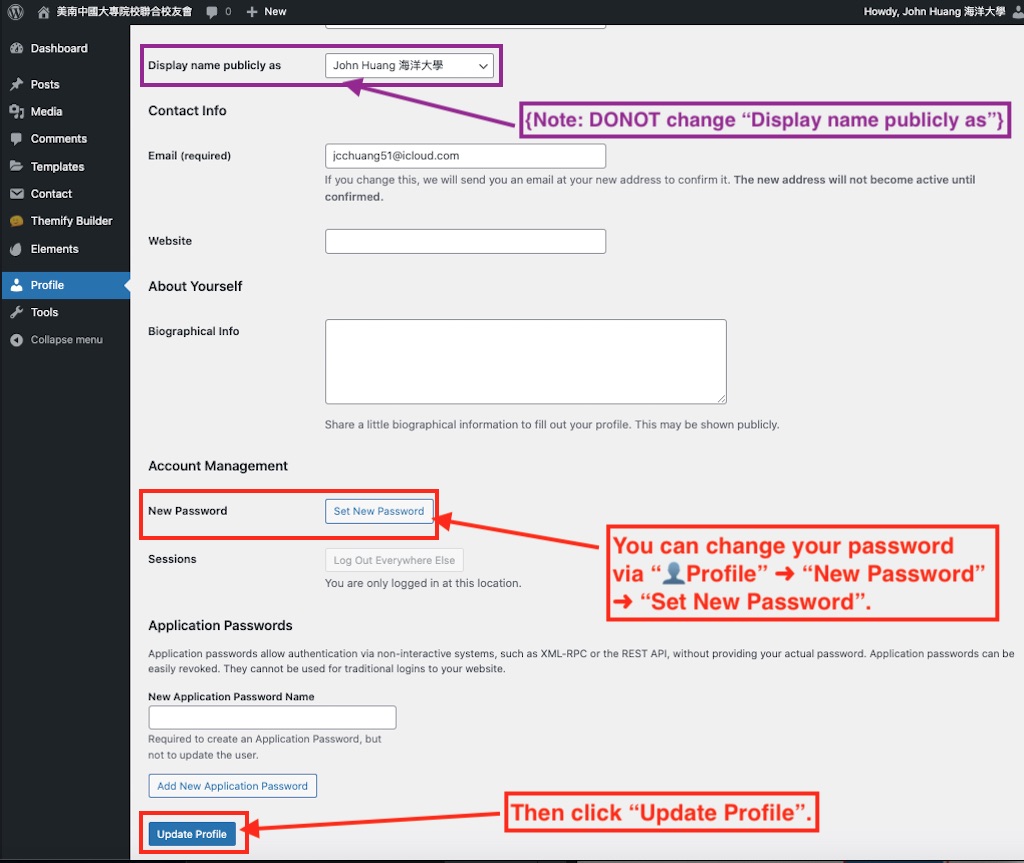
You can change your password via “👤Profile” ➜ “New Password” ➜ “Set New Password”.{Note: DONOT change “Display name publicly as”}. Then click “Update Profile”.
Click to the top of page
How to add a new Post in draft
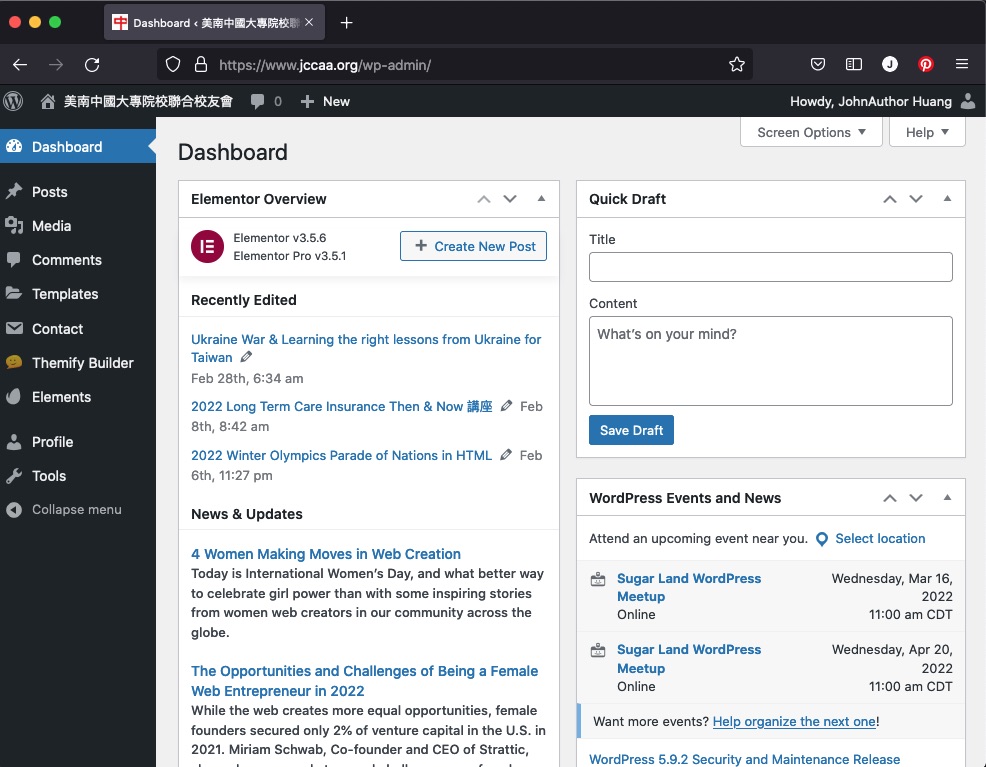
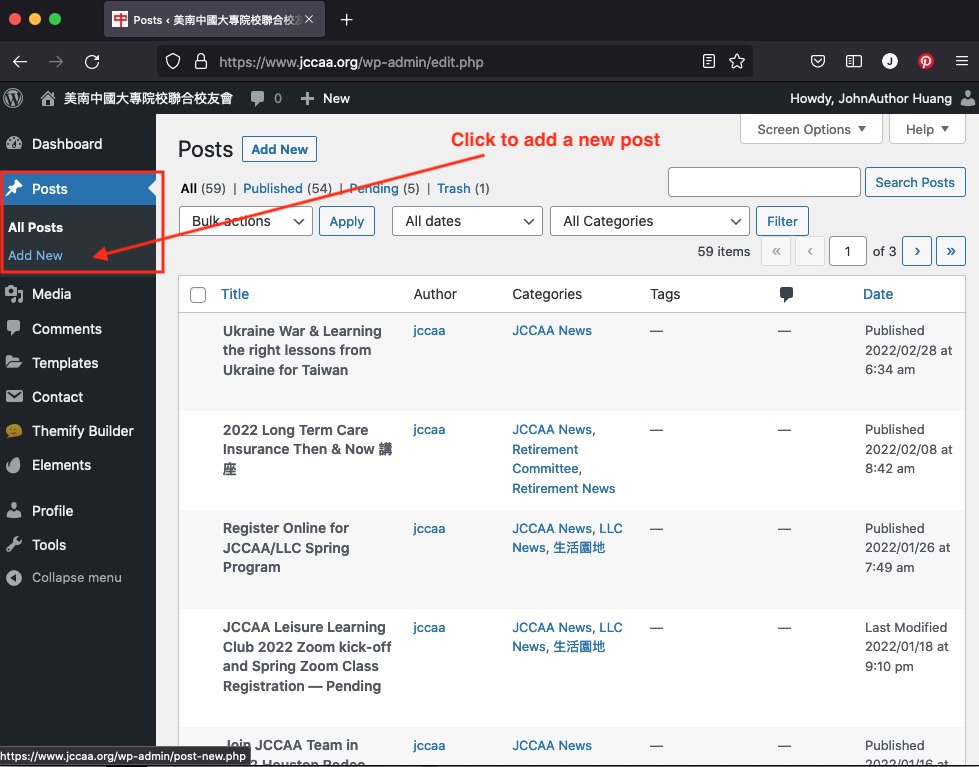
From WordPress ⏲ Dashboard ➜ 📌Posts ➜ All Posts, click “Add New” to start a new post. {Notice: WordPress adopts “Post” word to represent all web pages you create. Therefore, WordPress uses “Page” to represent another meaning.}
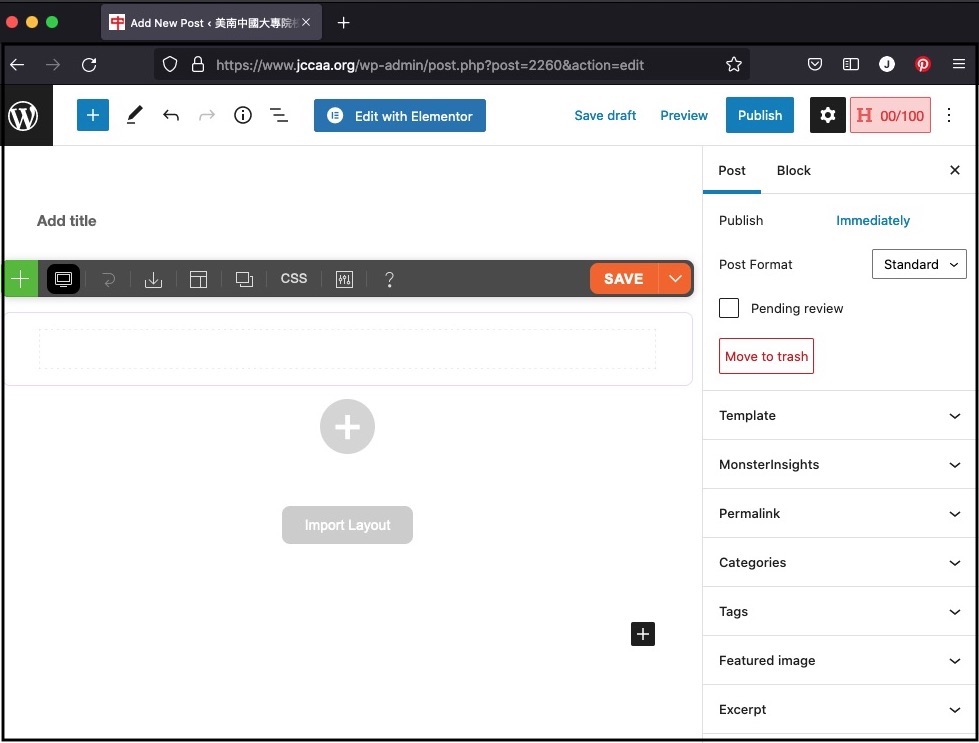
This is a brand new post.
Click to the top of page
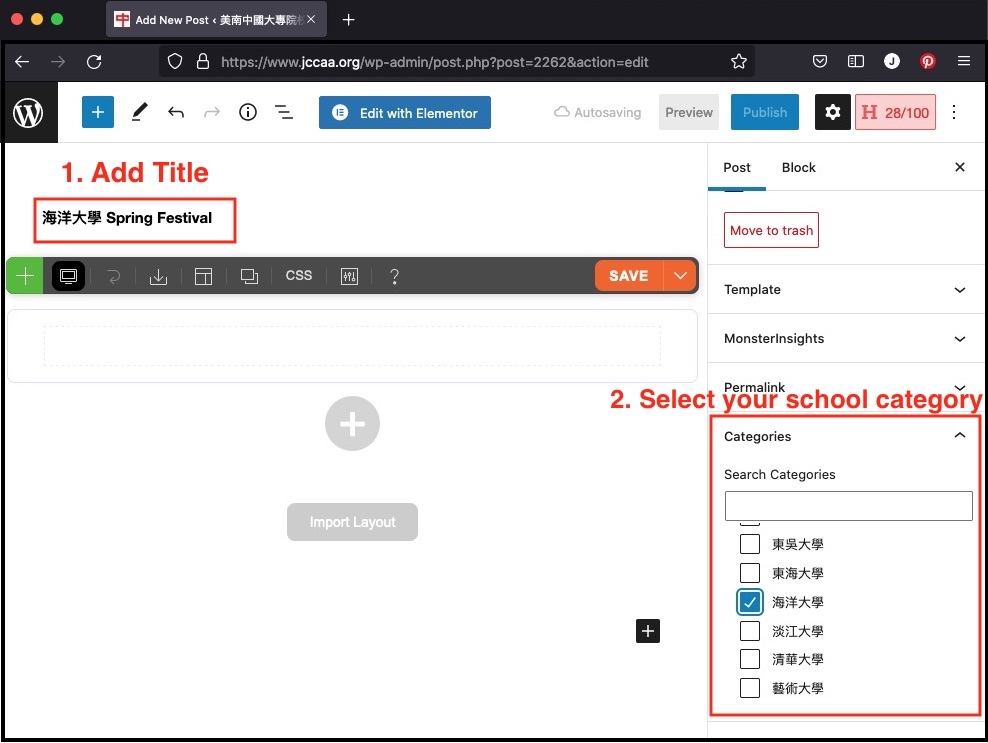
Add Title and Select Your school Category
It is required to enter Title and School Category for each new post.
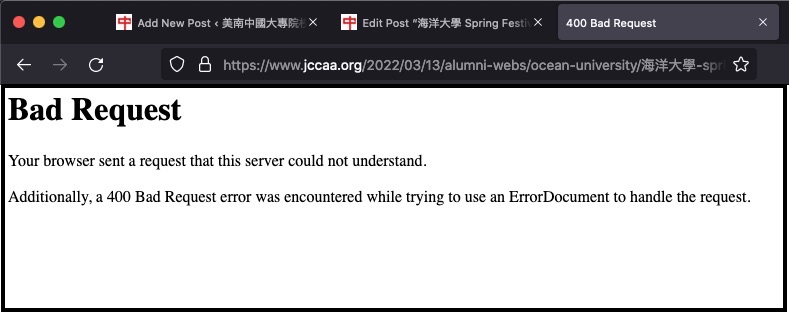
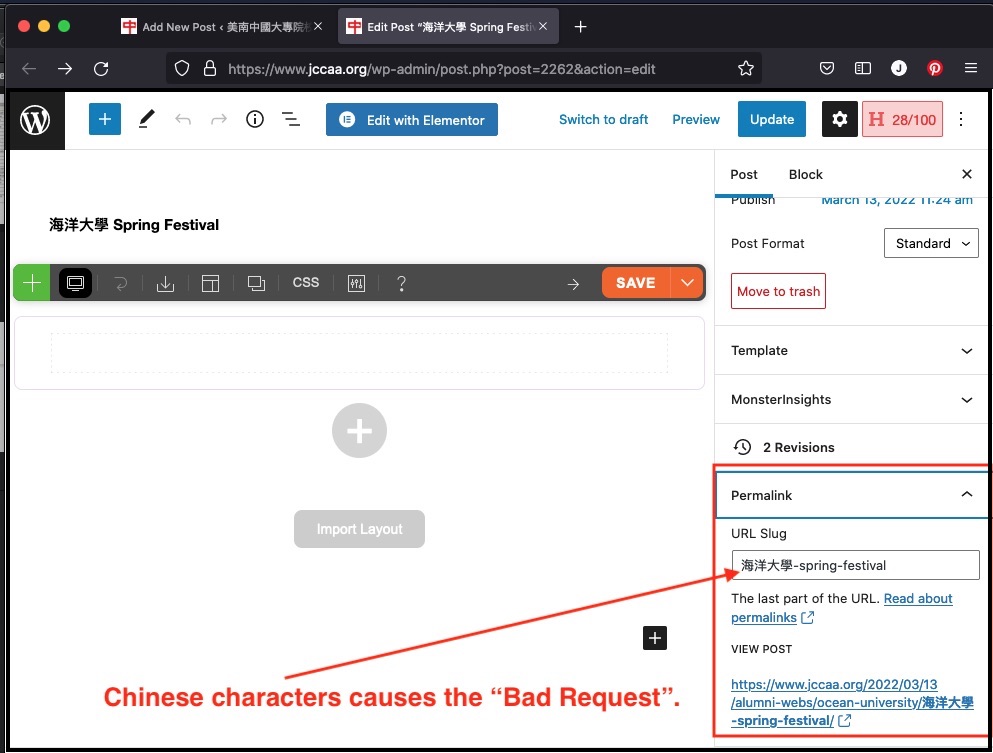
If your Title contains any Chinese characters (i.e.海洋大學), click “Preview” might get “Bad Request” page, as below: {Note: DONOT click “Publish”}
If your Title contains any Chinese characters (i.e.海洋大學), click “Preview” might get “Bad Request” page.
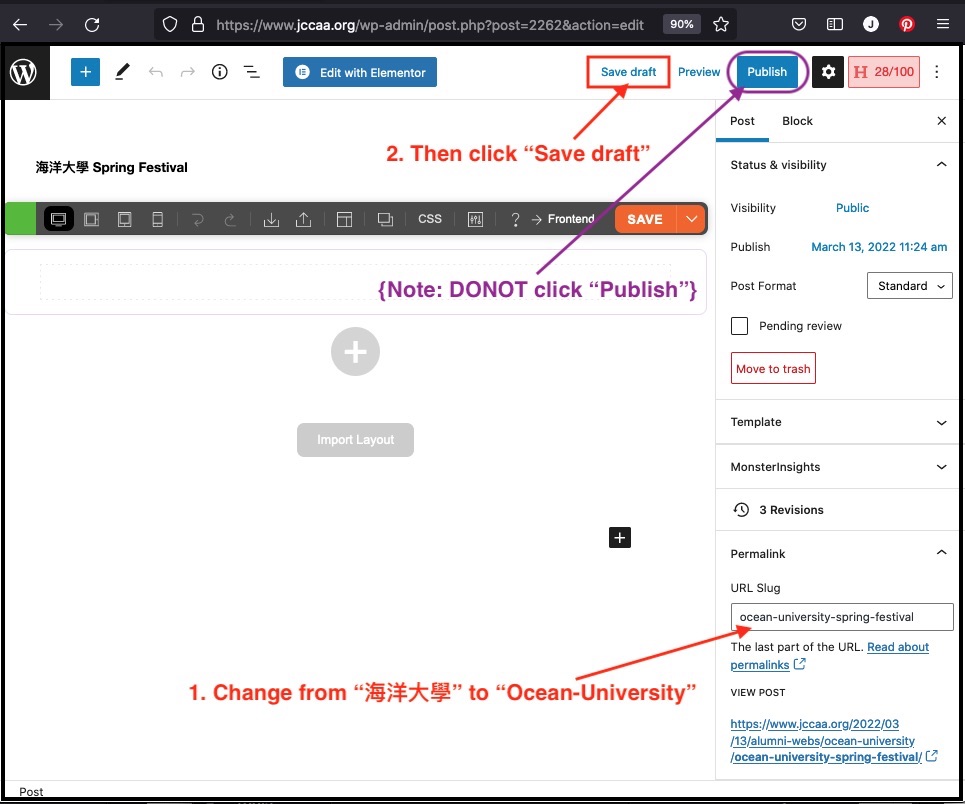
To solve the above problem, you need to change the “Permalink” to be ALL ENGLISH letters inside the “URL Slug” field.
You need to change from “海洋大學” to “Ocean-University”, then click “Save draft”. {Note: DONOT click “Publish”}
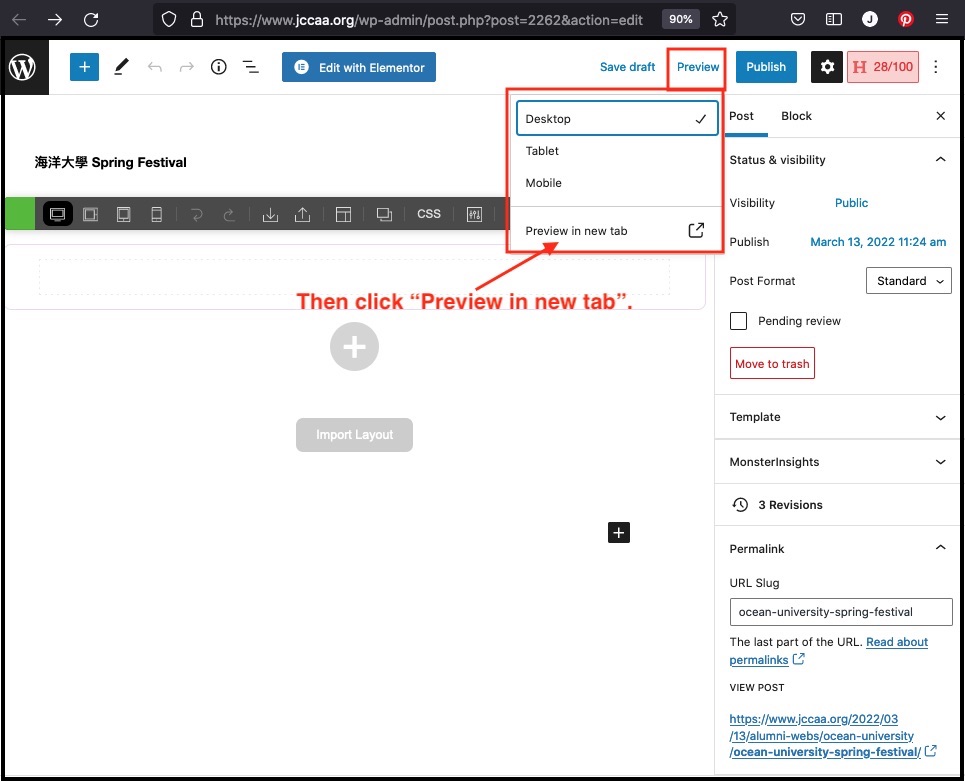
Then click “Preview in new tab”.
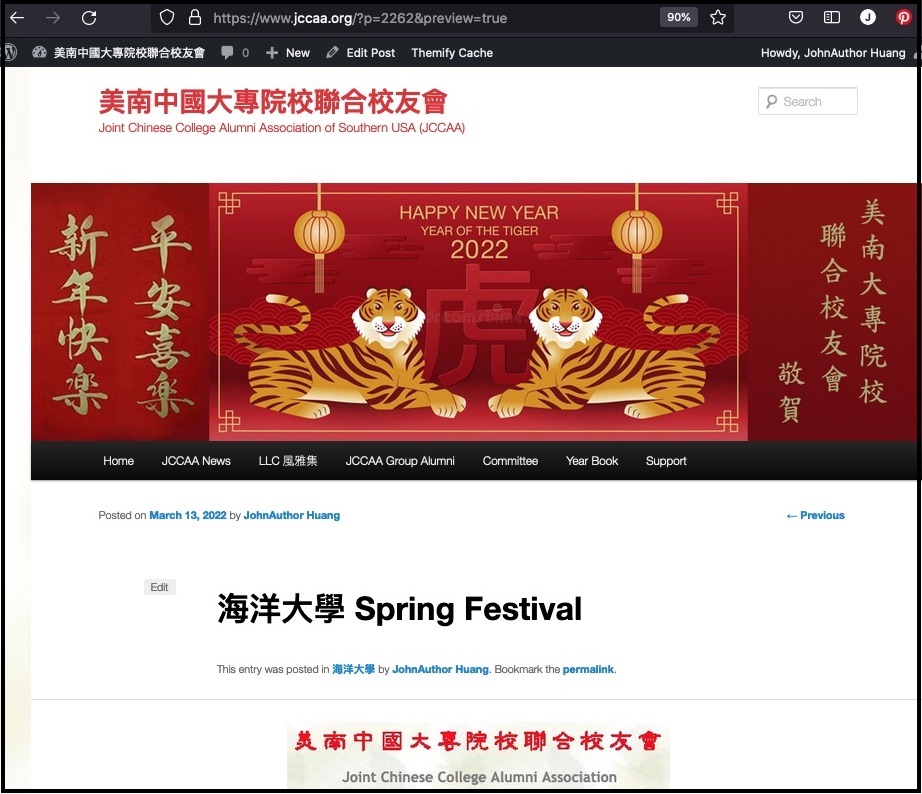
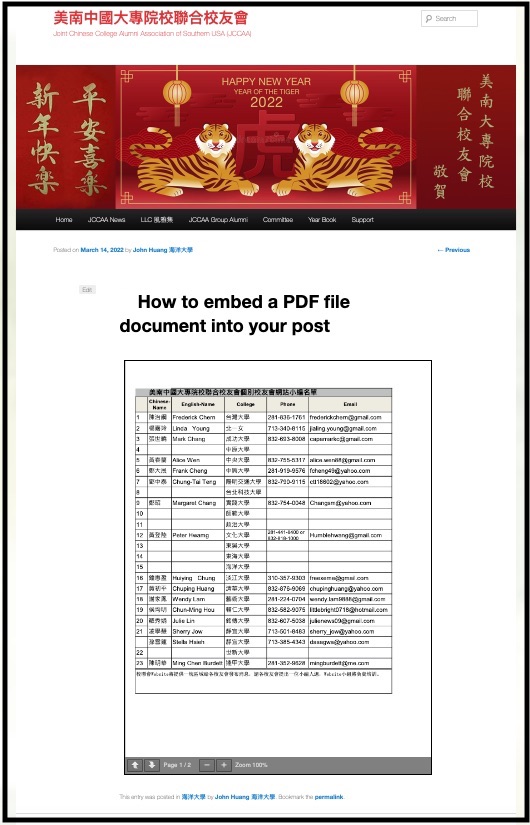
Preview your post in draft
Click to the top of page
How to change you post status between "Published" and Draft"?
In case you click “Publish” accidentally,you can change post status from “Published” to “Draft” by following the two steps below:
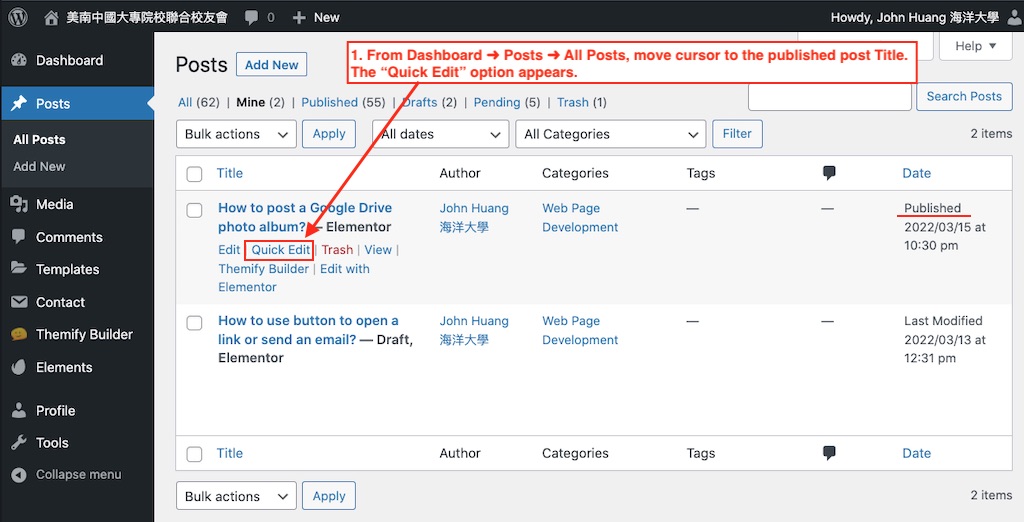
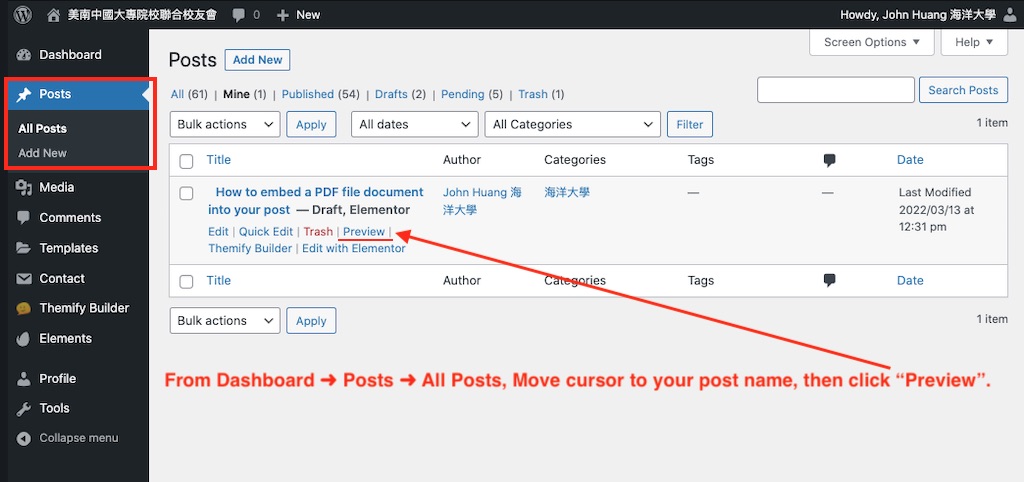
From ⏲ Dashboard ➜ 📌Posts ➜ All Posts, move cursor to the published post Title. The “Quick Edit” option appears.
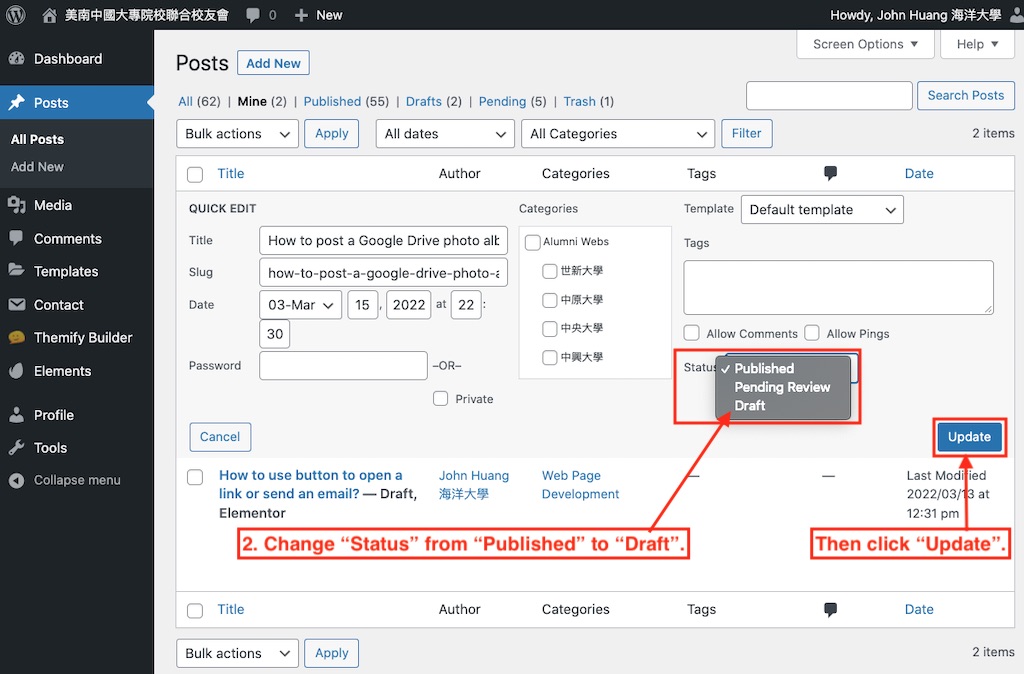
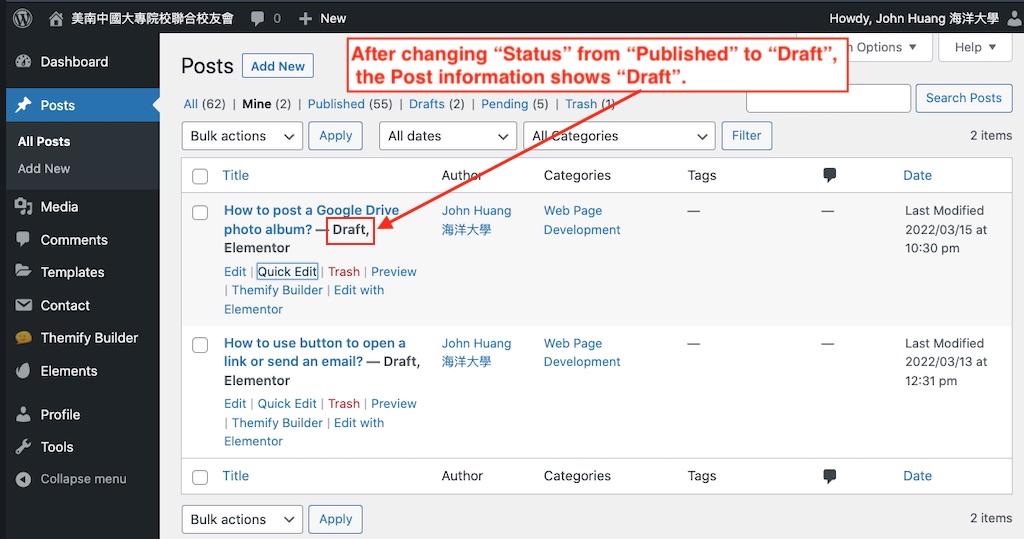
Click “Quick Edit”. Change “Status” from “Published” to “Draft”. Then click “Update”.
Click to the top of page
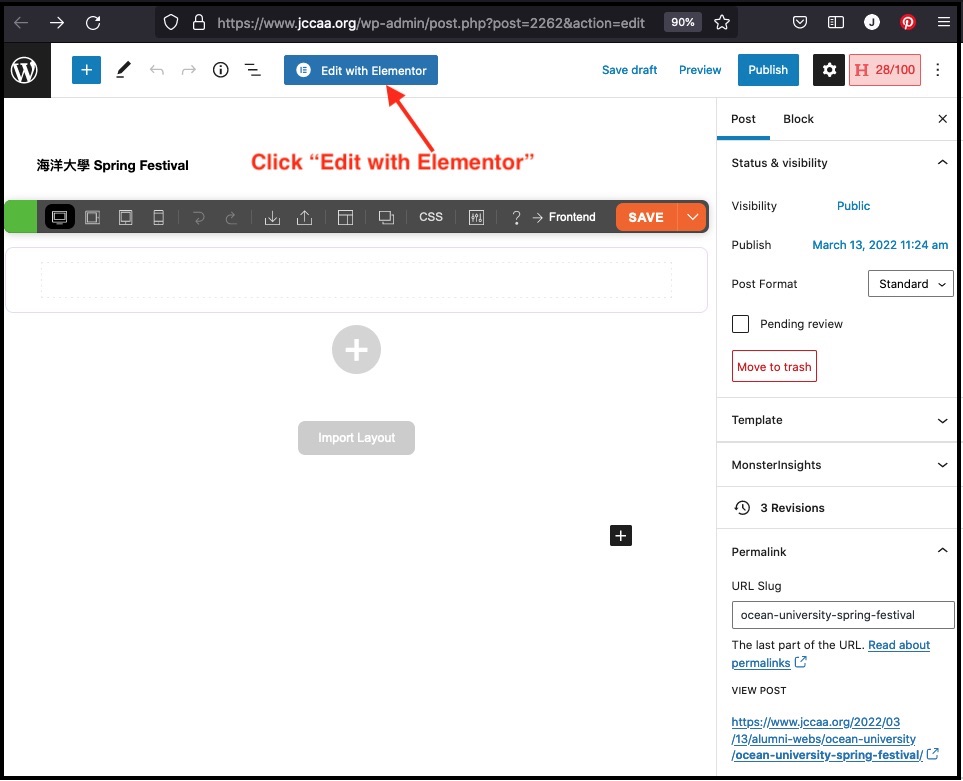
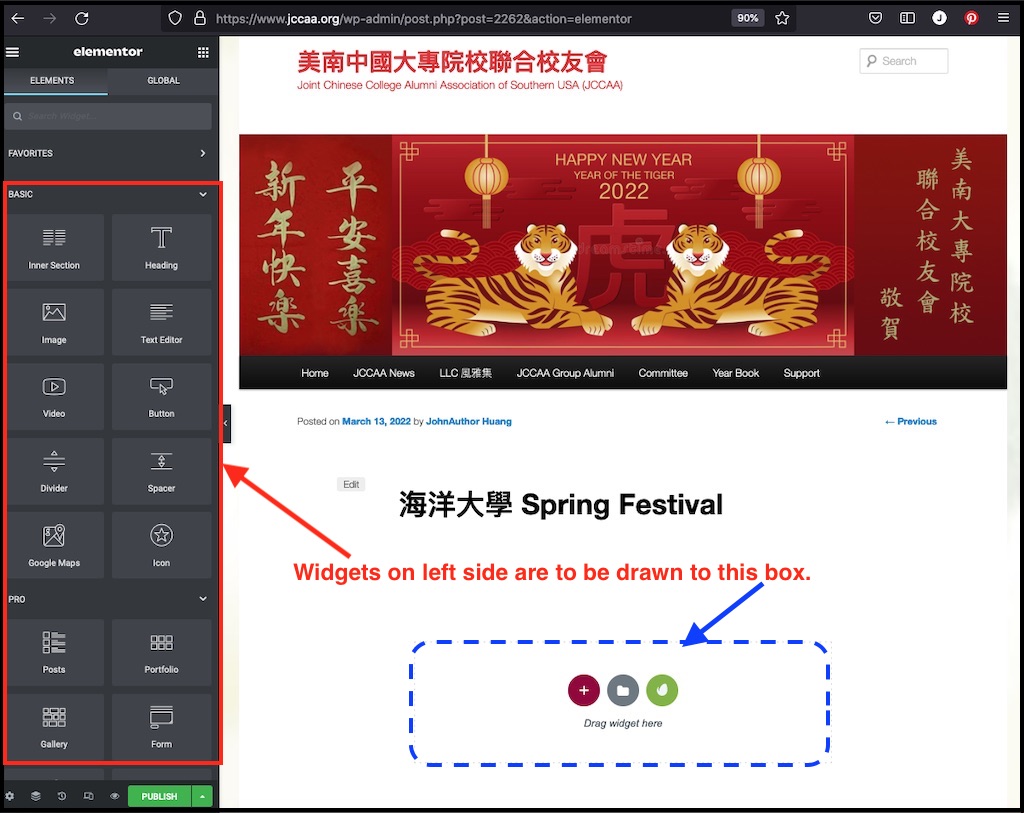
How to edit your new post with “Elementor” widgets?
Now it is ready to edit your new post with Elementor, which provides many user-friendly tools, called widgets, for your web post editing. Click “Edit with Elementor”.
Click to the top of page
How to write your text contents ?
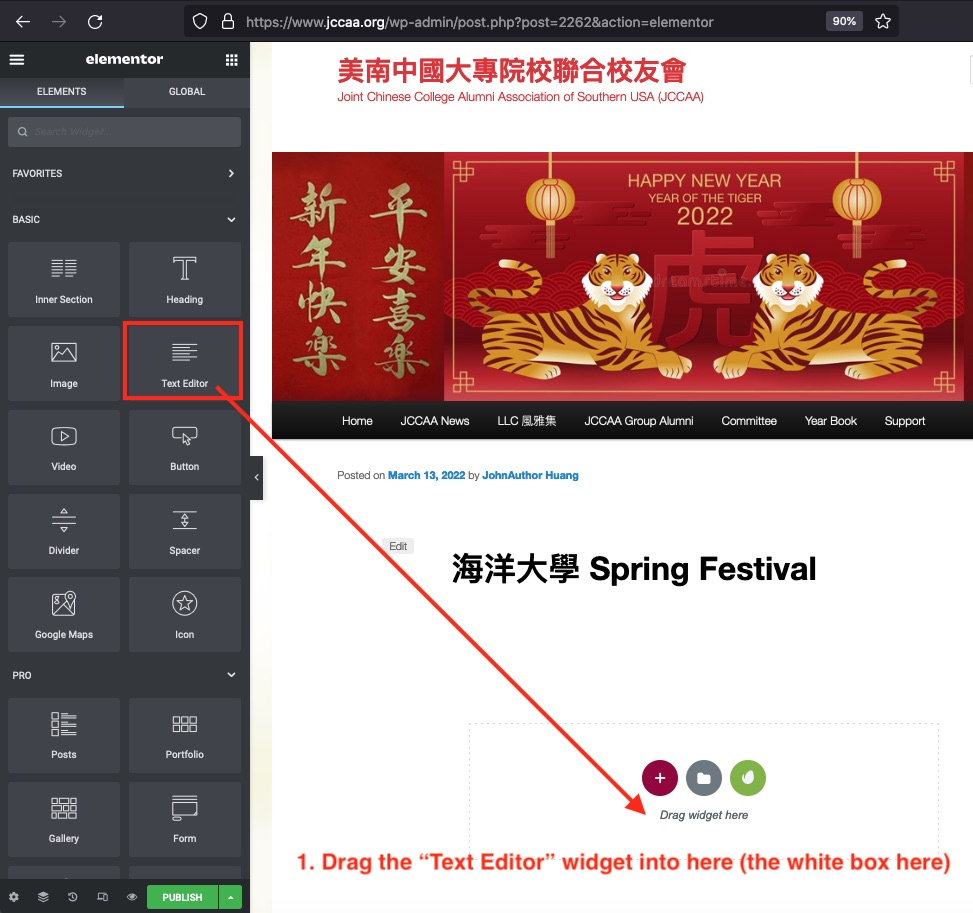
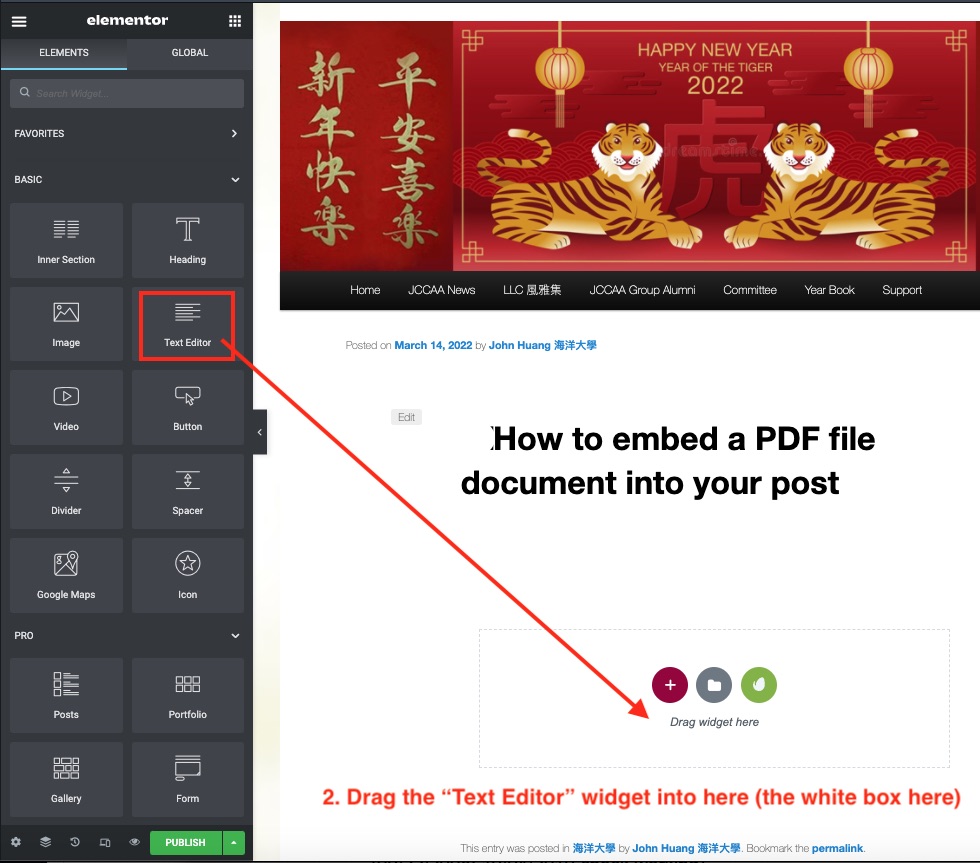
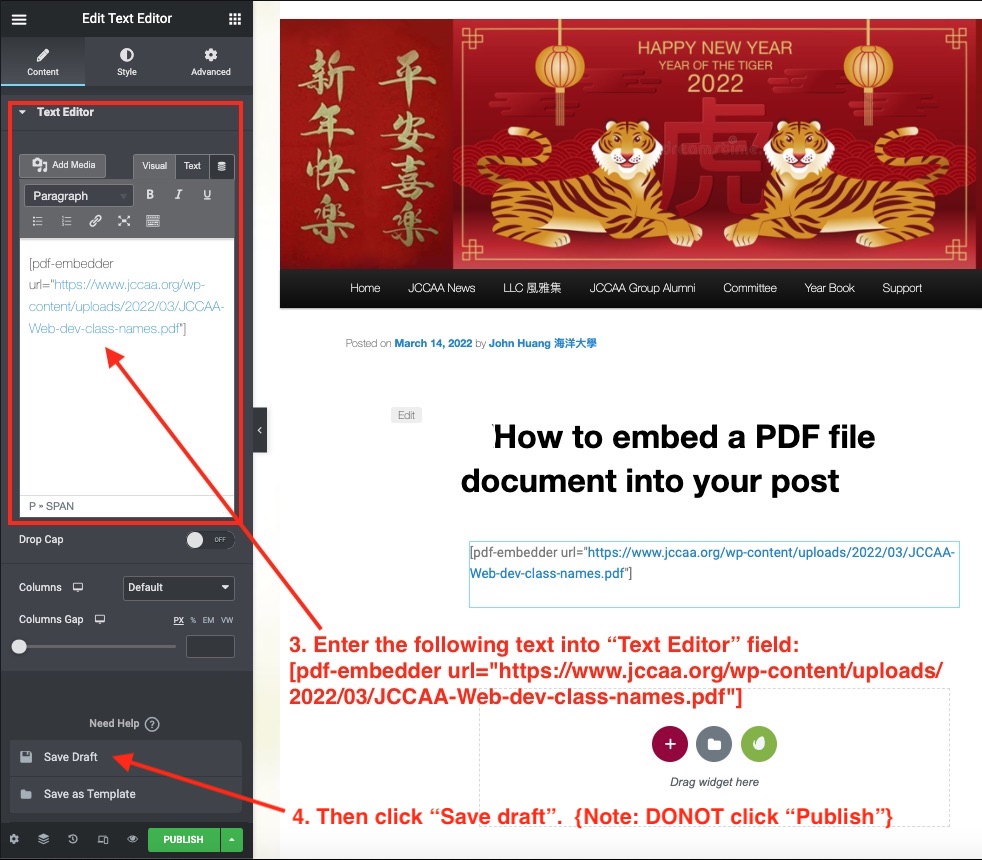
Three steps to write text contents in your new post:
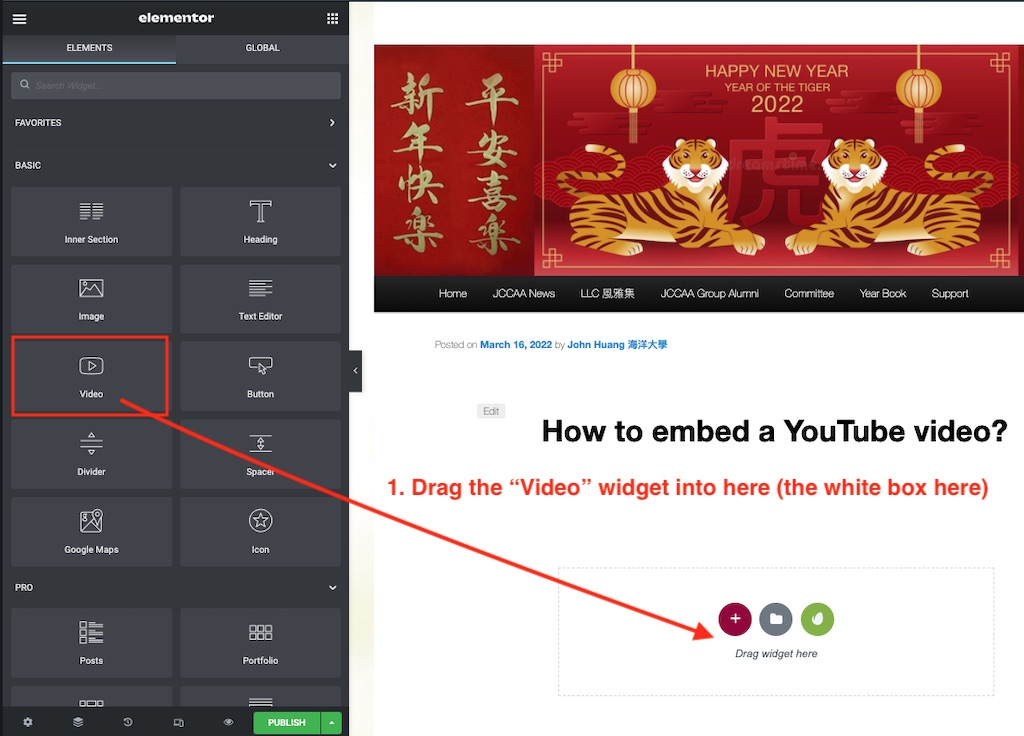
Drag the “Text Editor” widget into here (the white box here)
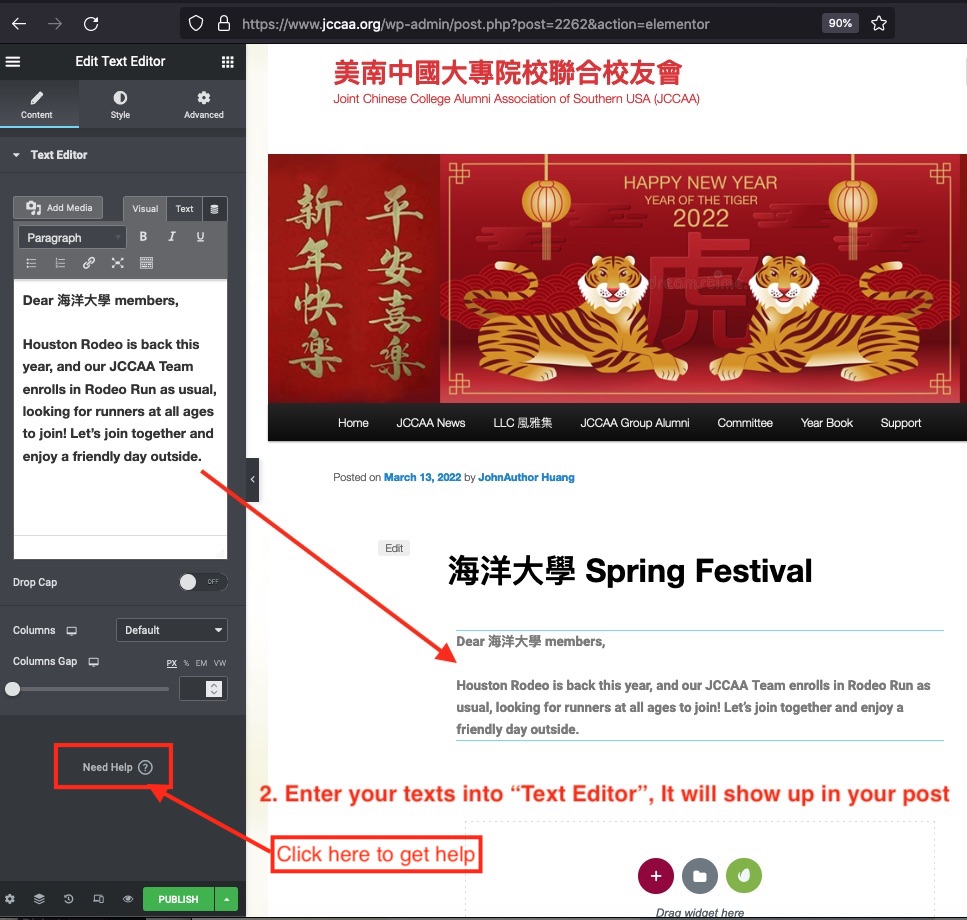
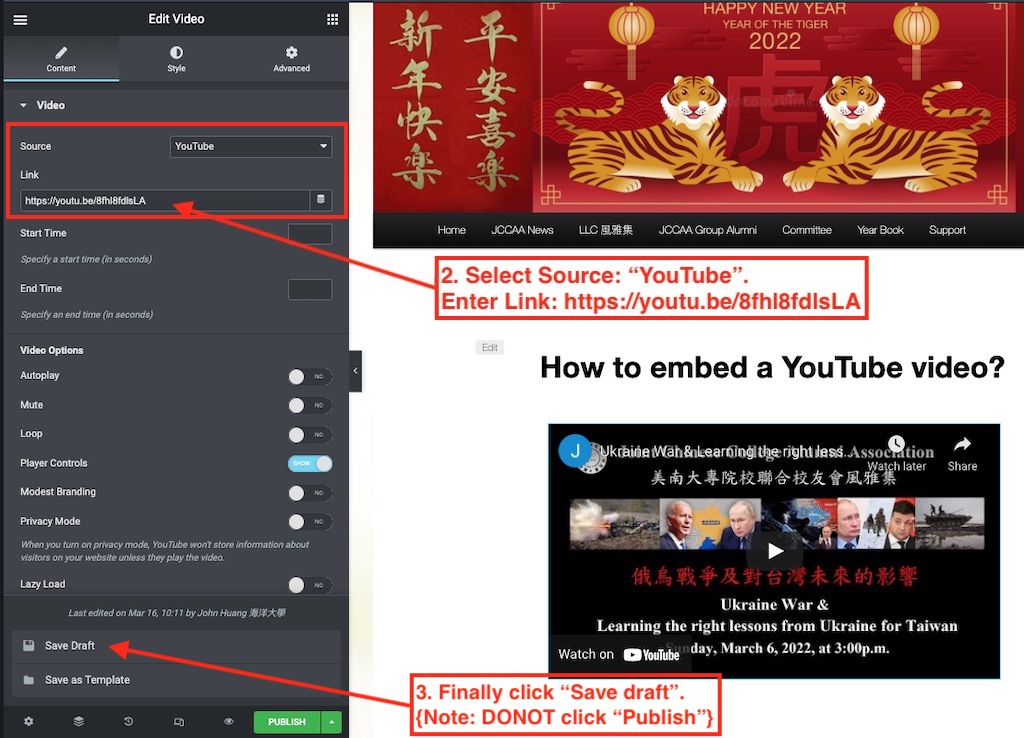
Enter your texts into “Text Editor”, It will show up in your post.
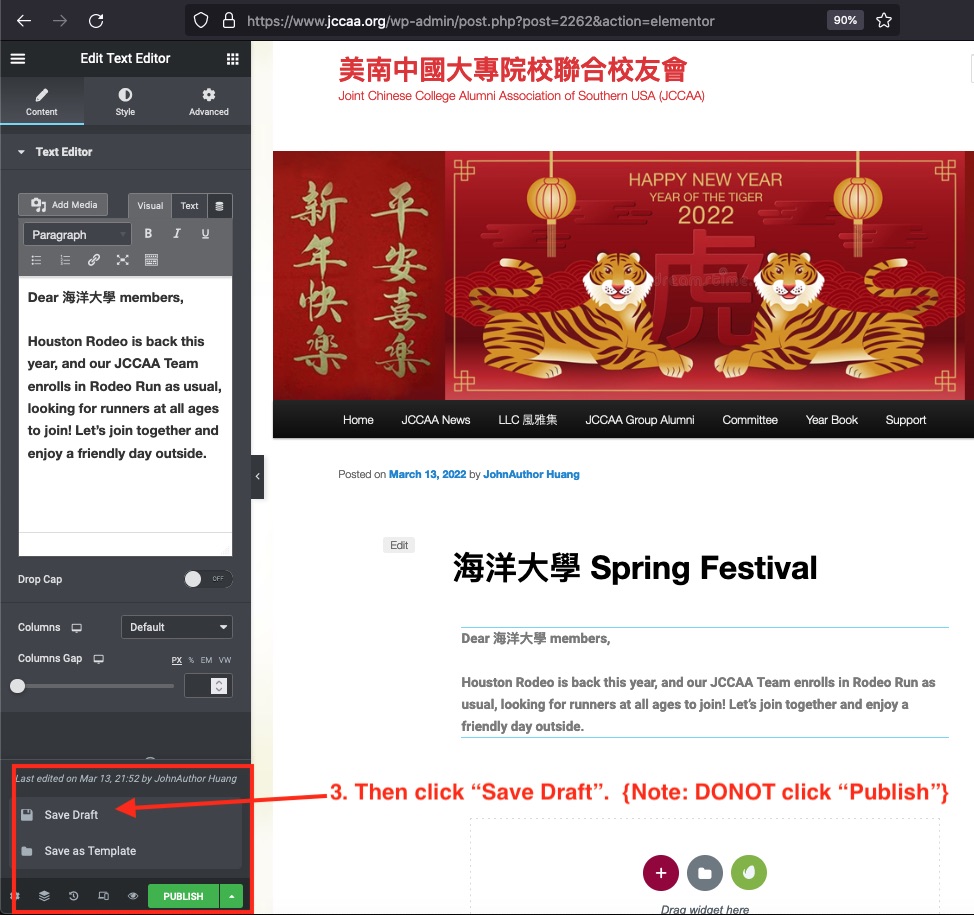
Then click “Save draft”.{Note: DONOT click “Publish”}
Click to the top of page
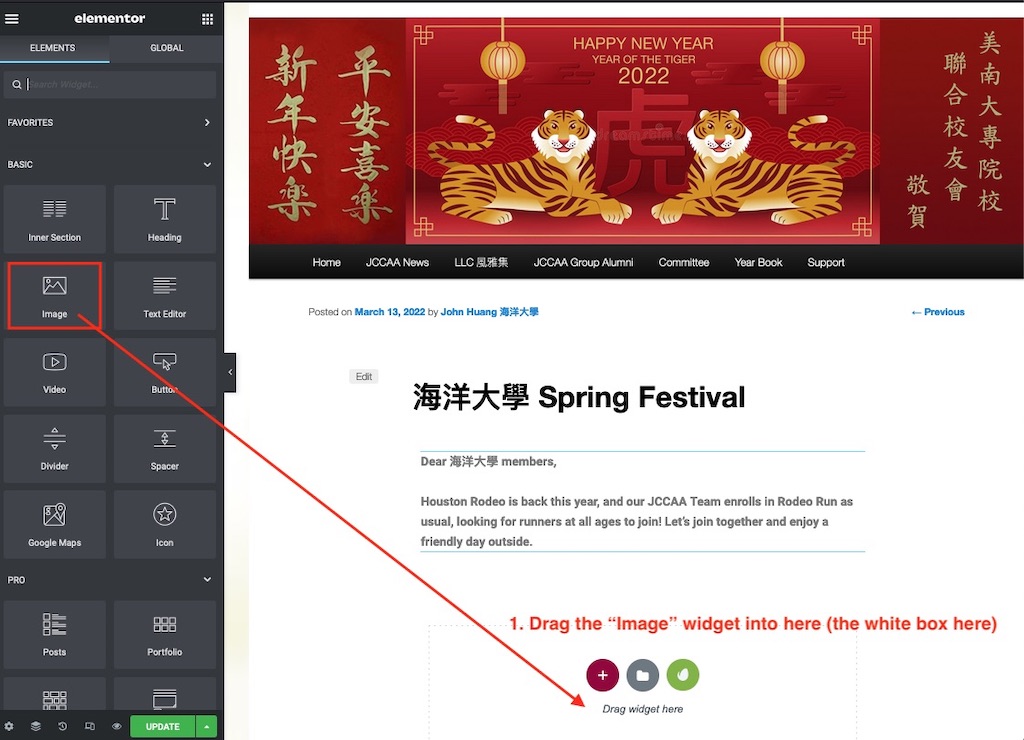
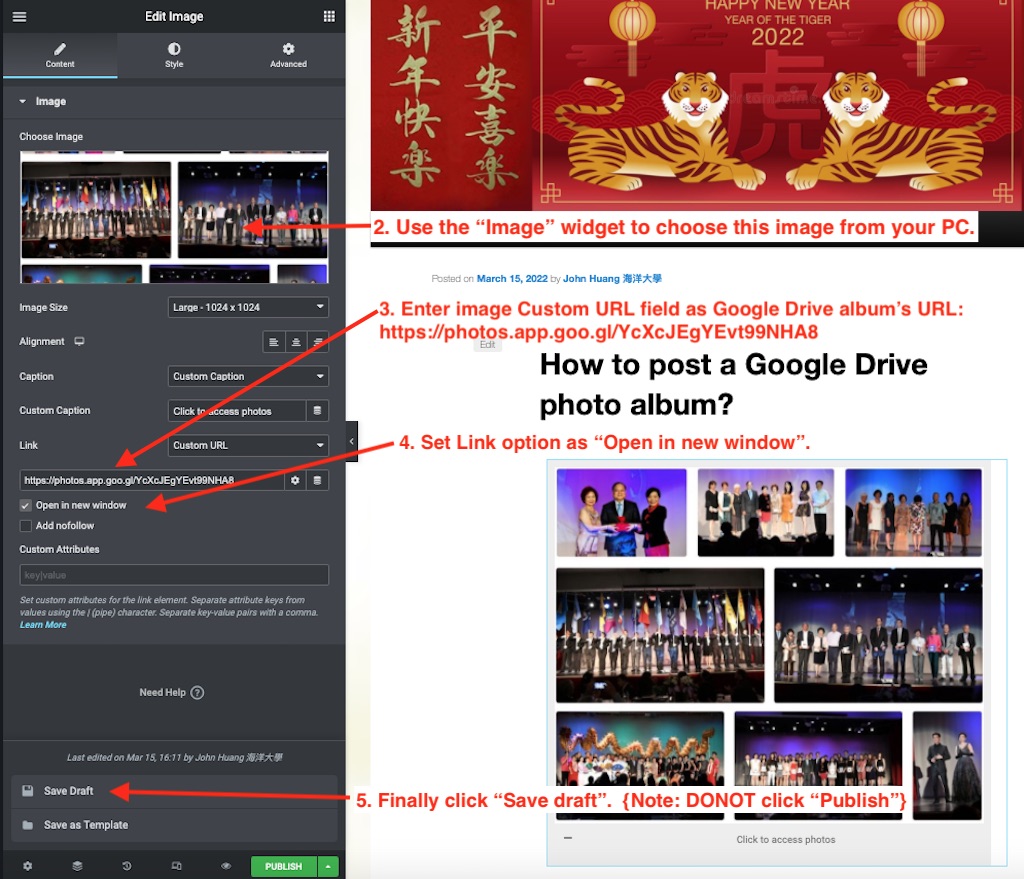
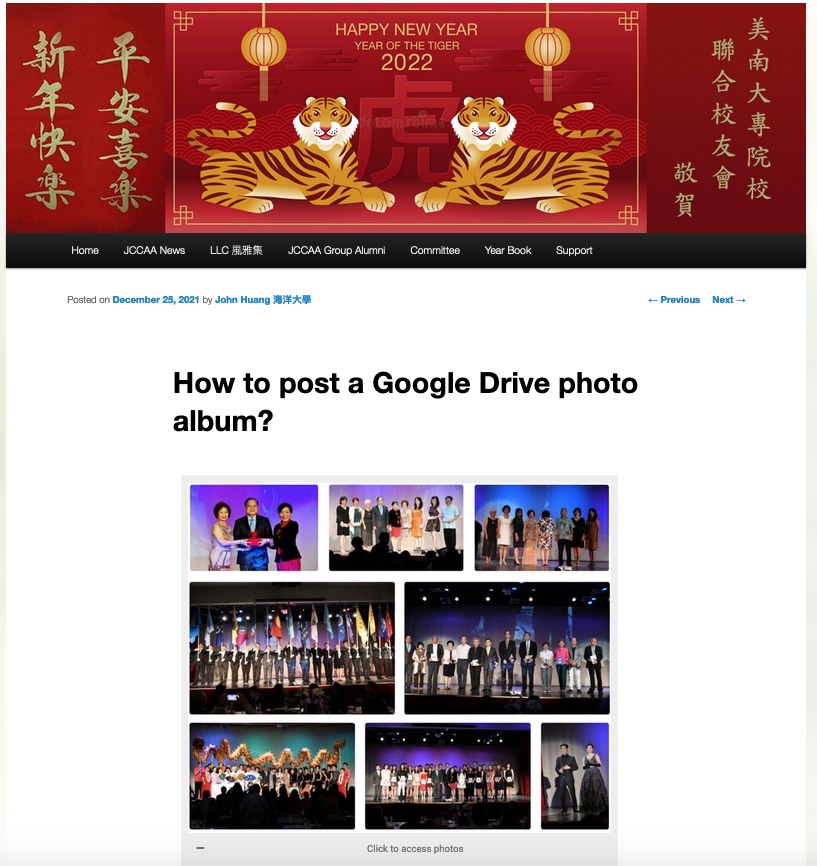
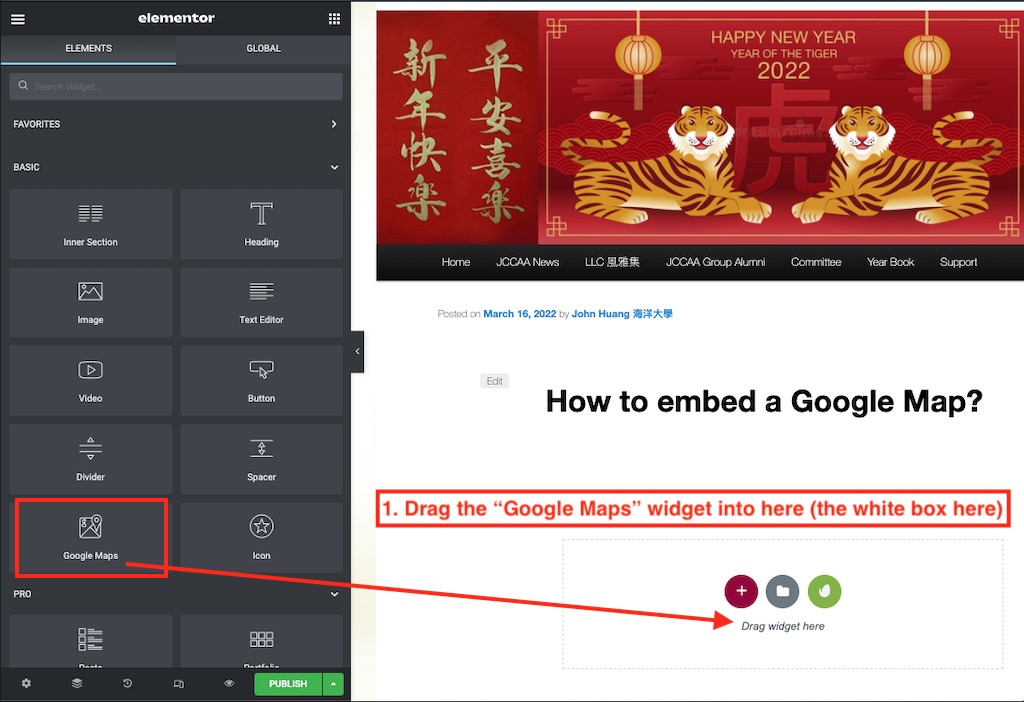
How to add a photo image?
Six steps to add image (width: 1024 pixel) into your post
Drag the “Image” widget into here (the white box here)
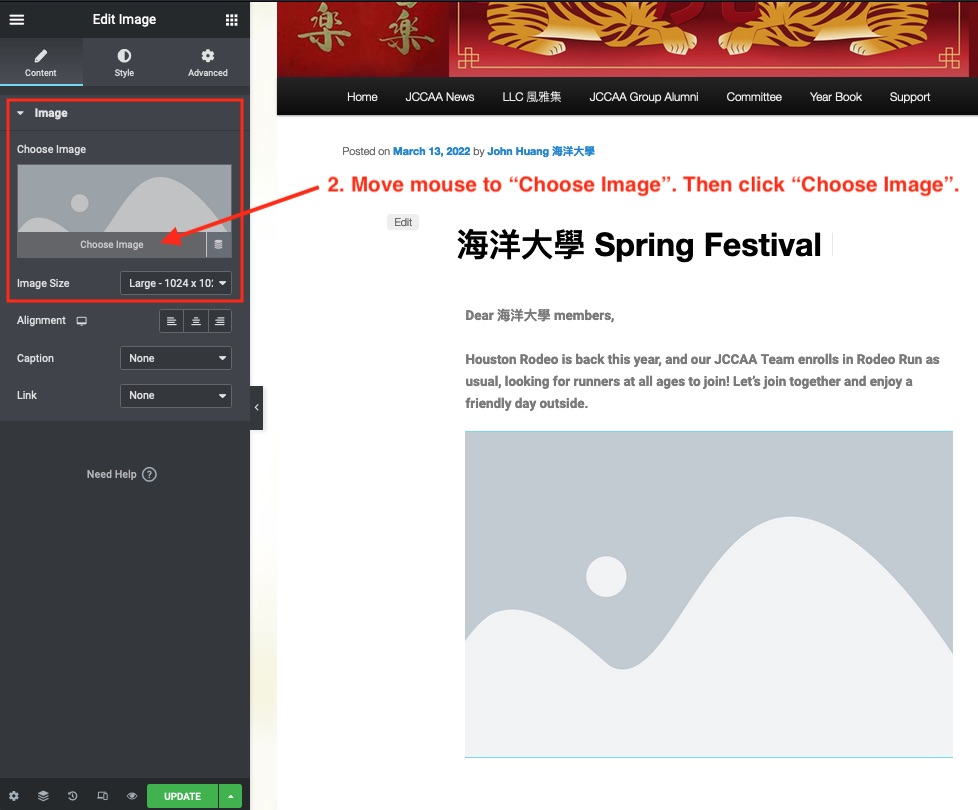
Move mouse to “Choose Image”. Then click “Choose Image”.
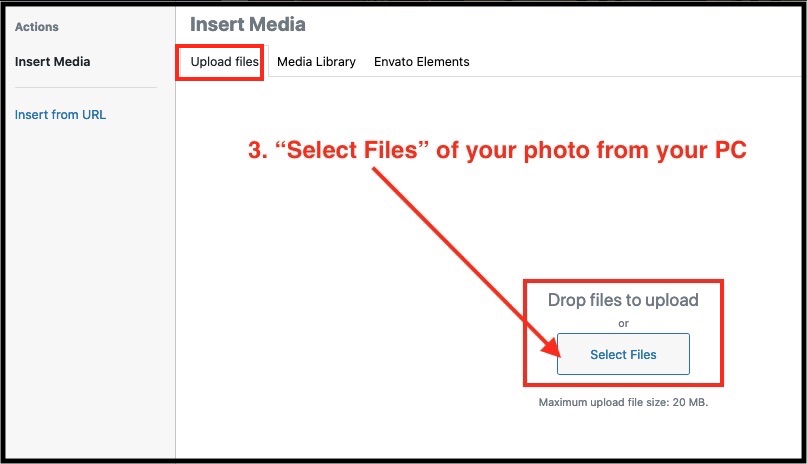
From “Upload Files“ tab, “Select Files” of your photo from your PC.
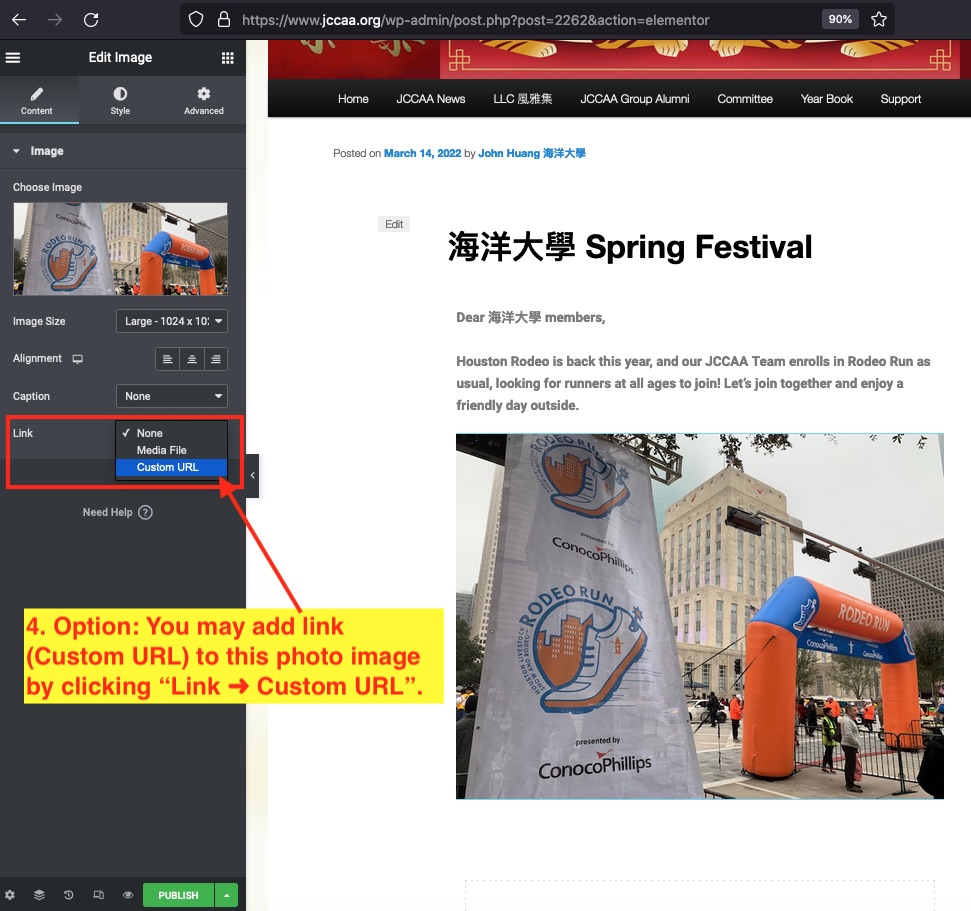
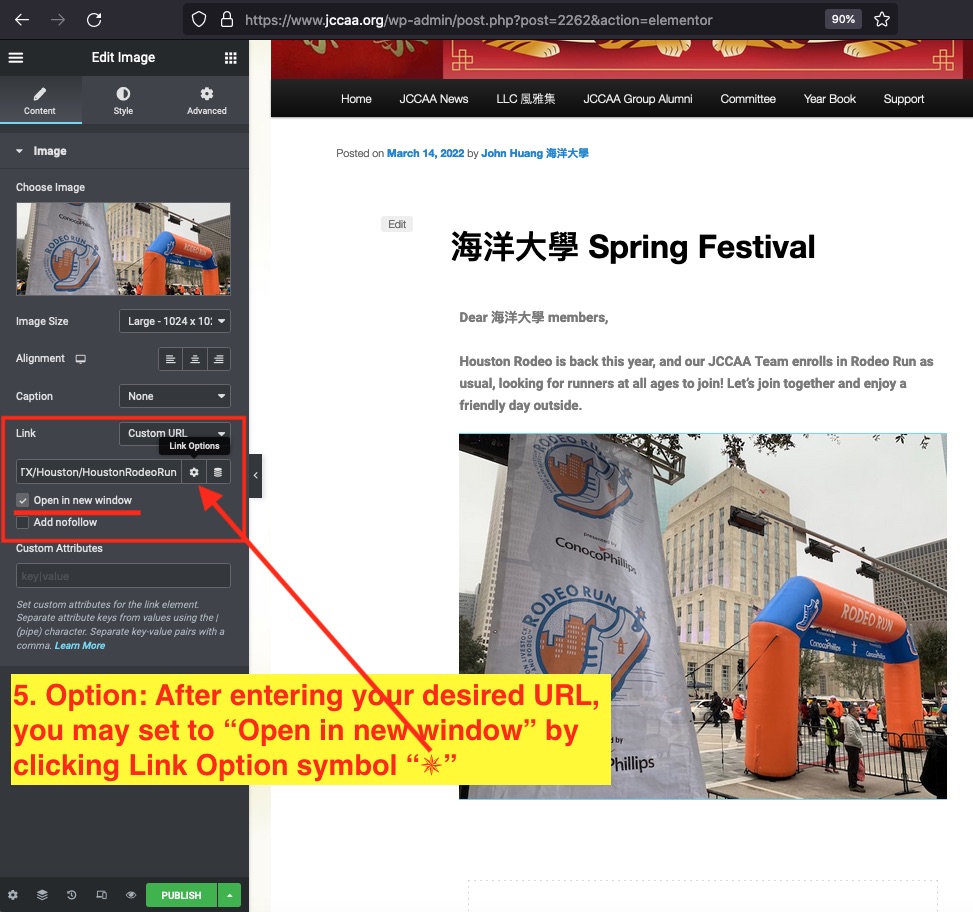
Option: You may add link (Custom URL) to this photo image by clicking “Link ➜ Custom URL”.
Option: After entering your desired URL, you may set to “Open in new window” by clicking Link Option symbol “✵”.
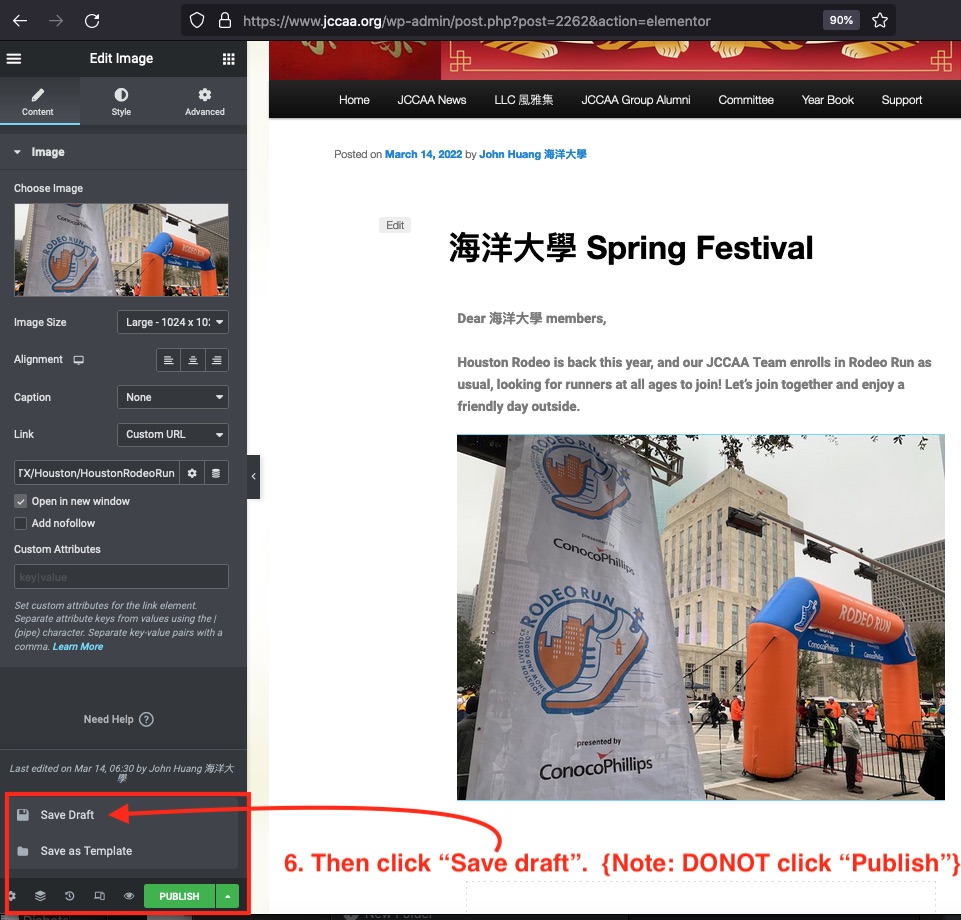
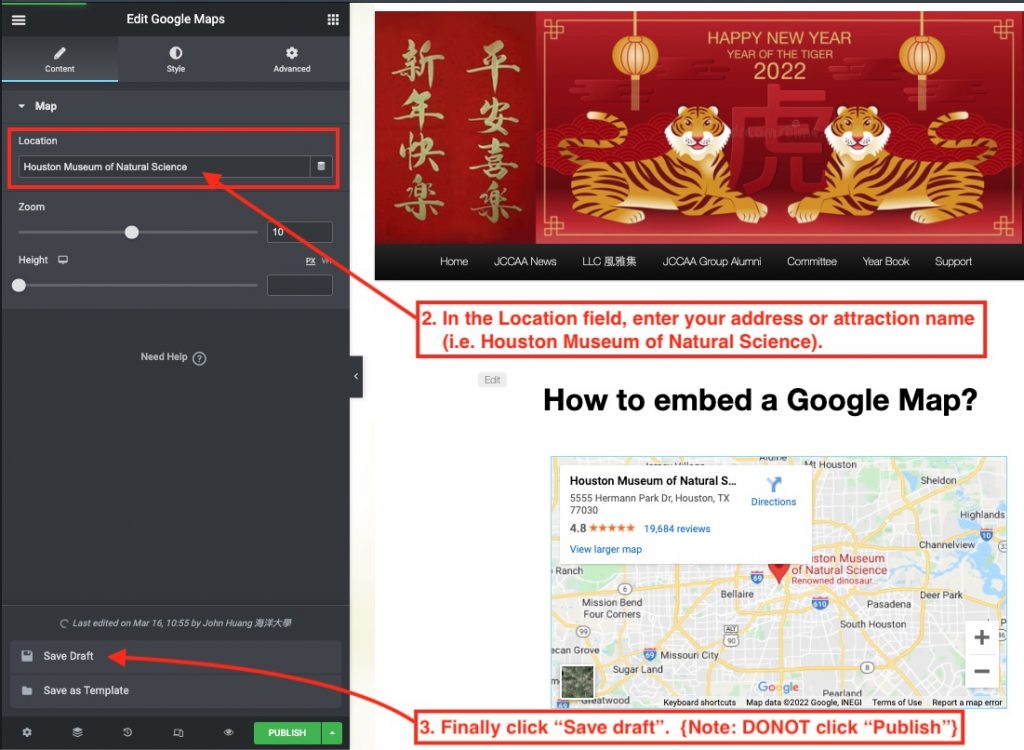
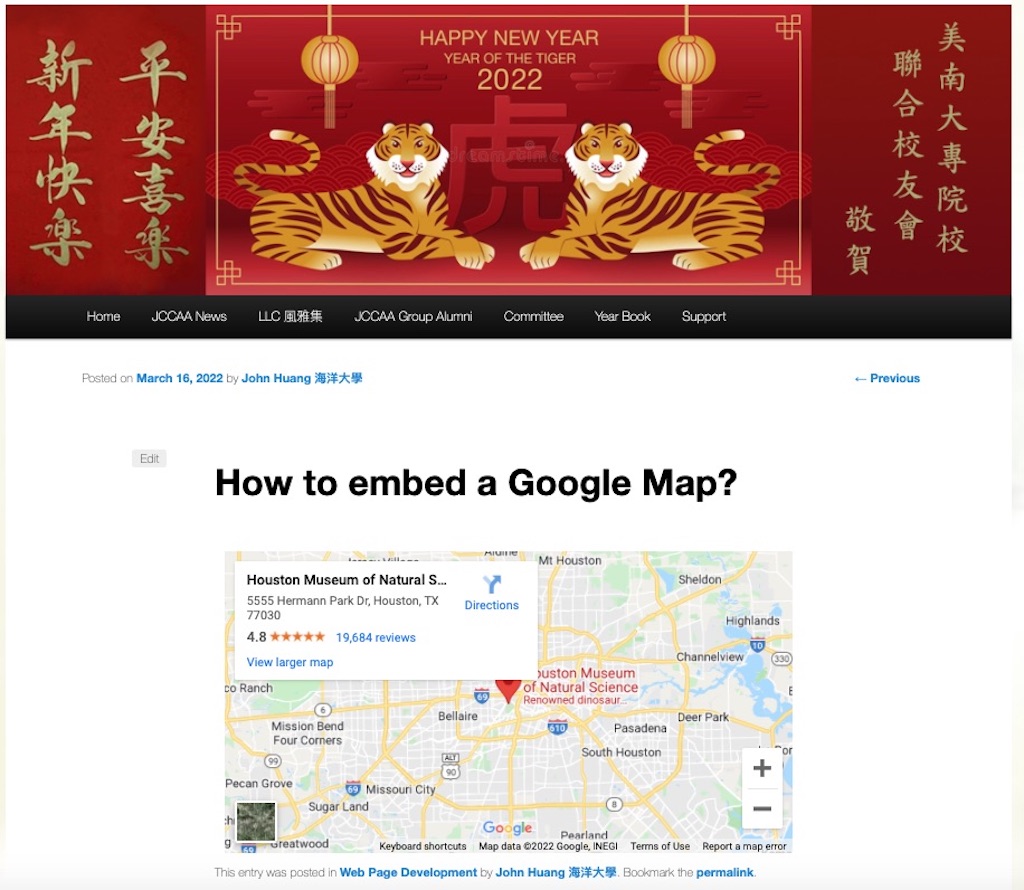
Then click “Save draft”.{Note: DONOT click “Publish”}
Click to the top of page
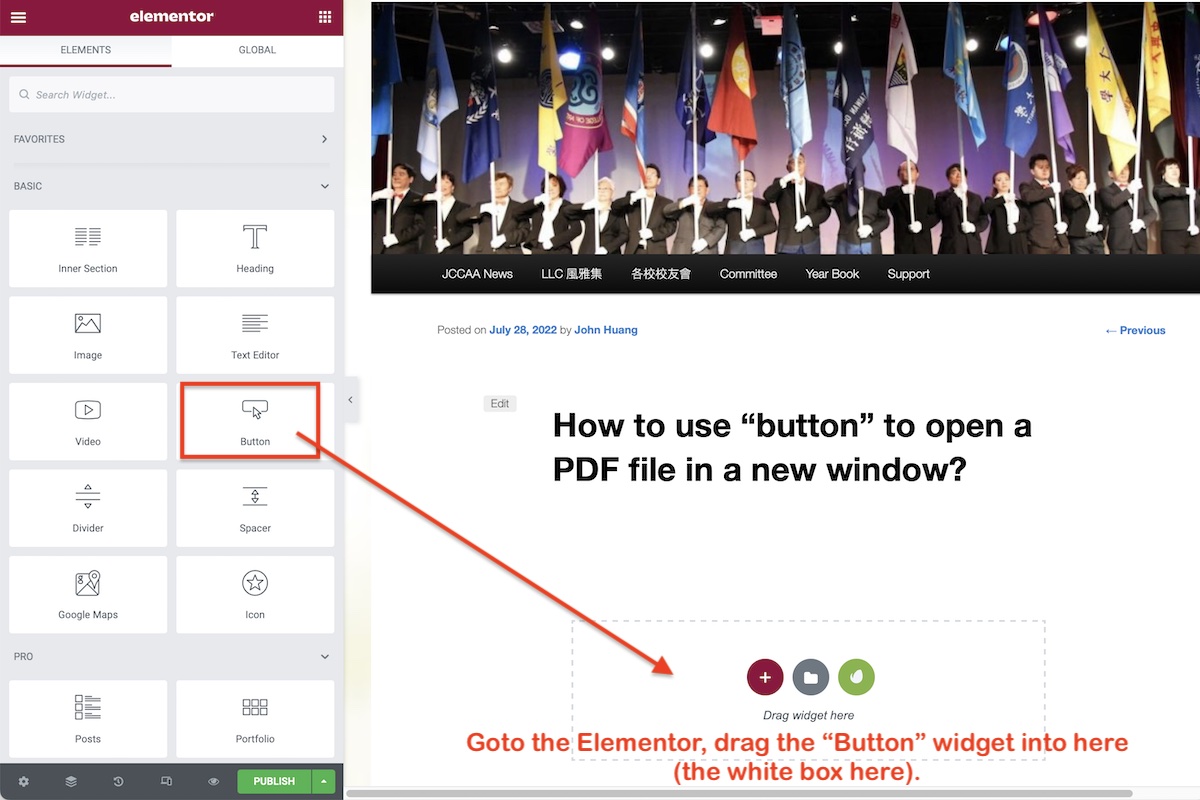
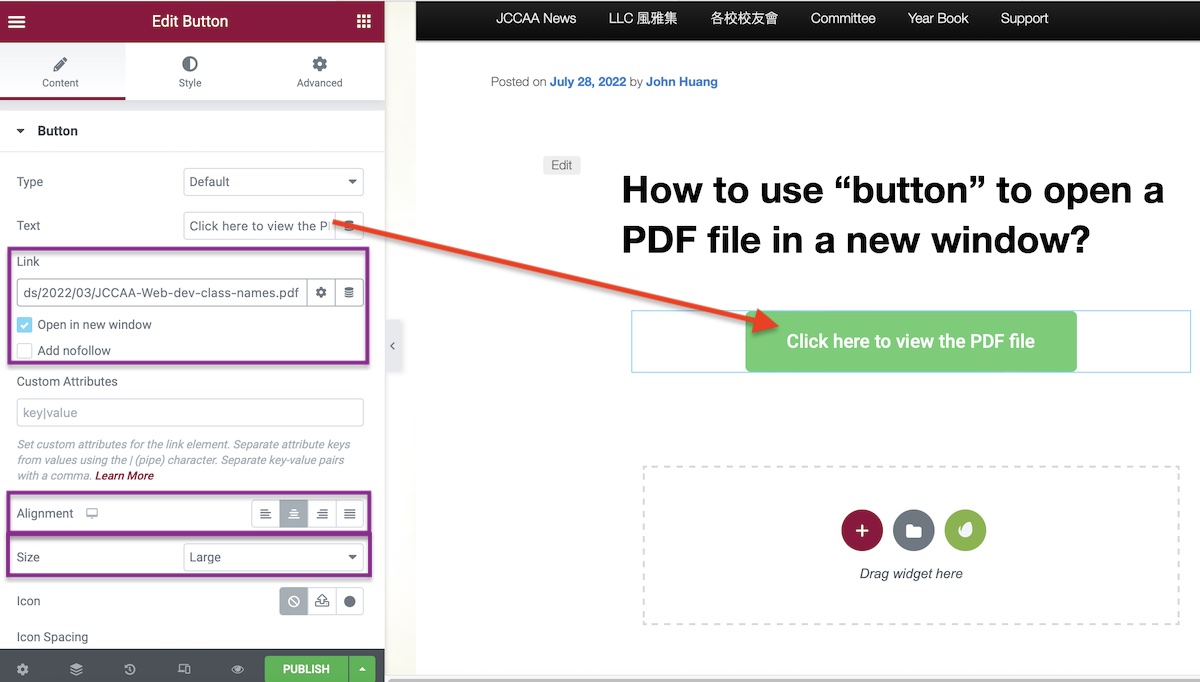
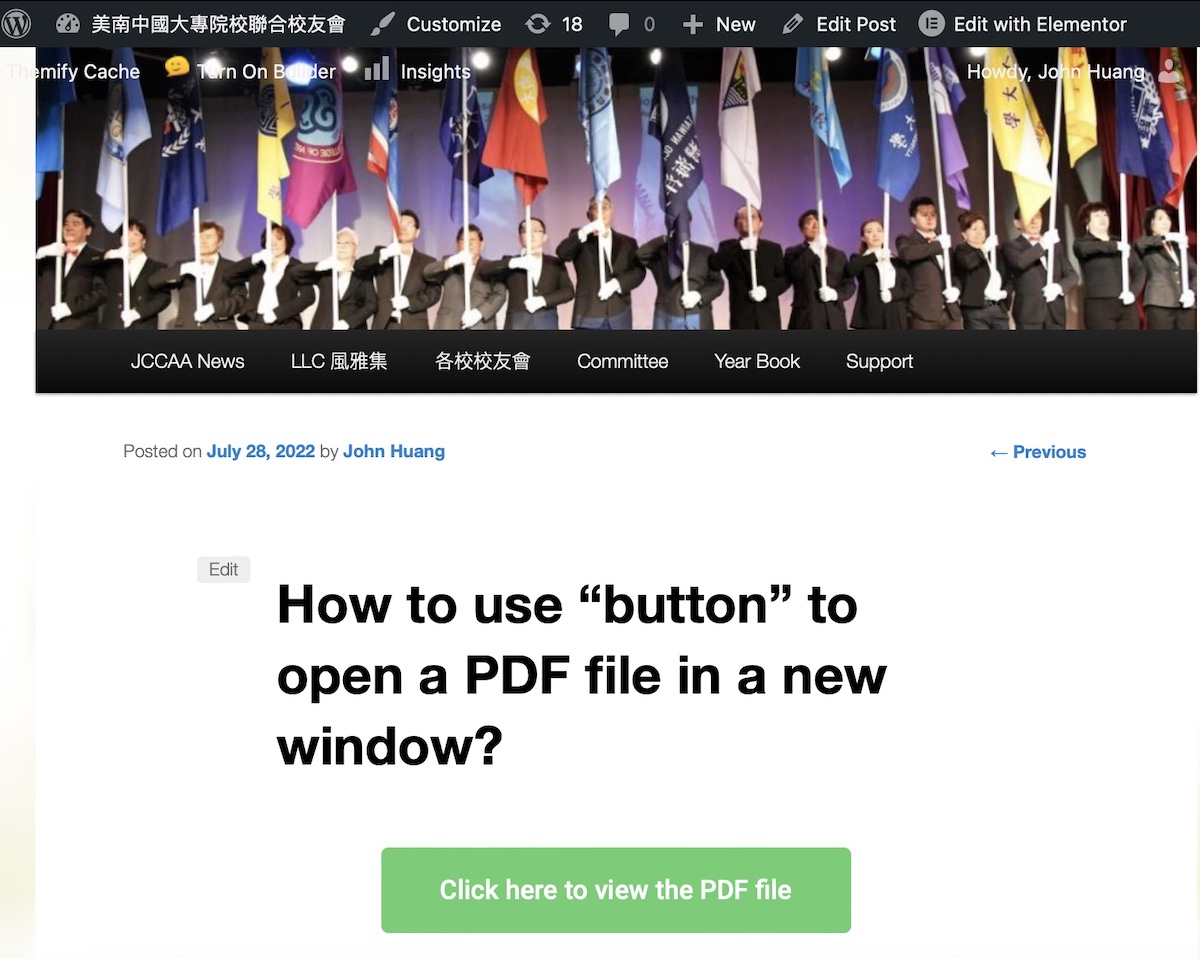
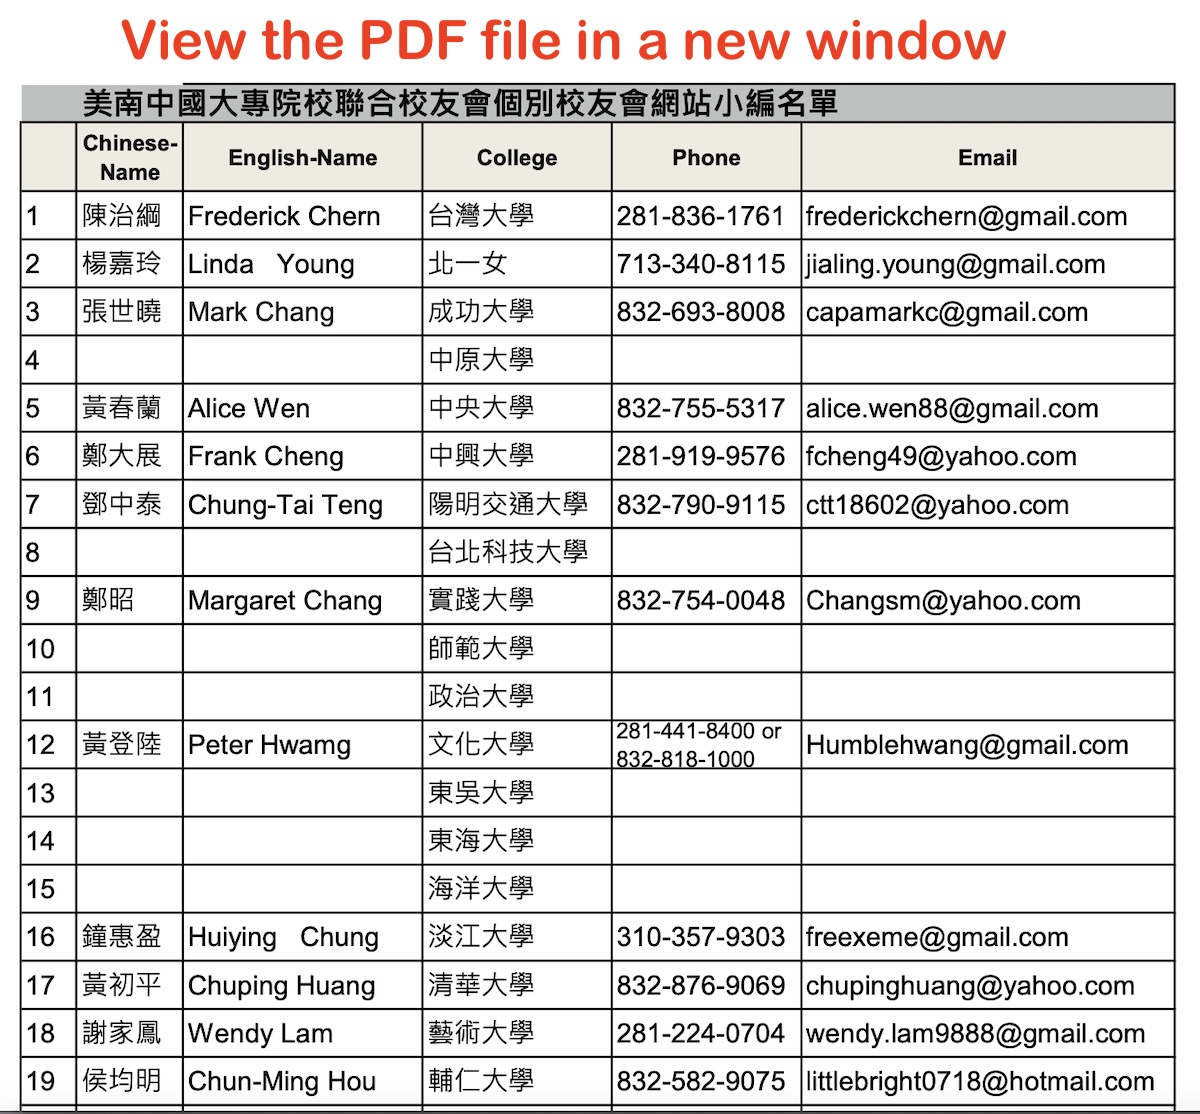
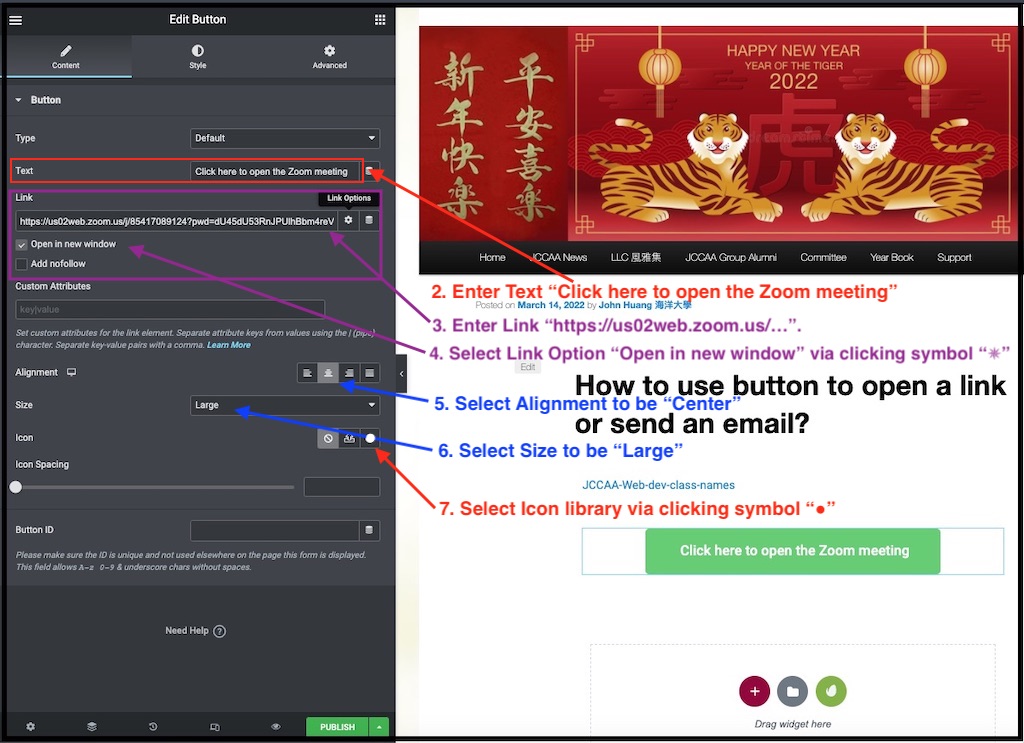
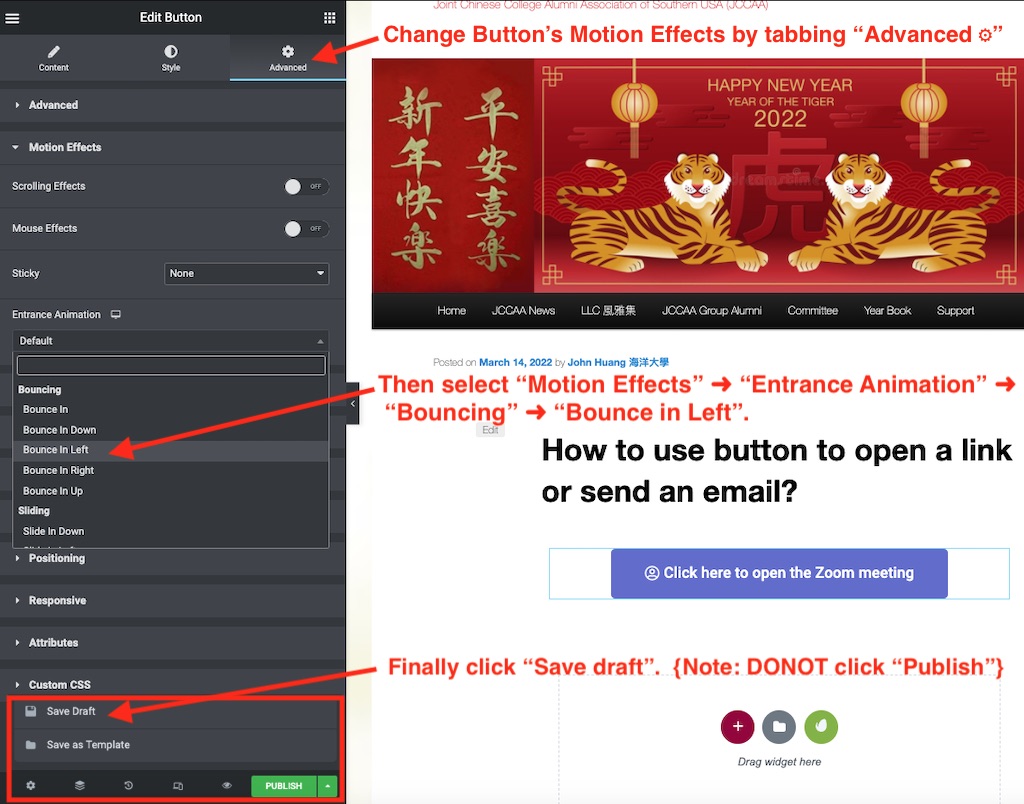
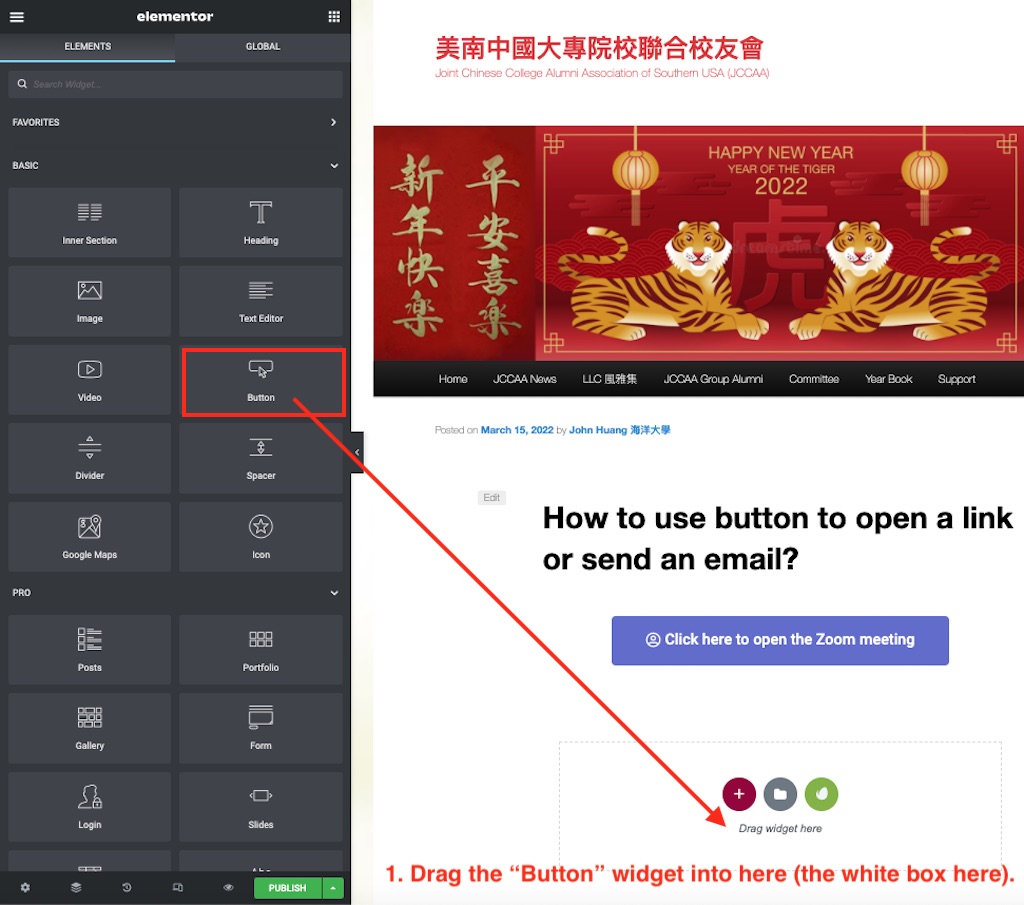
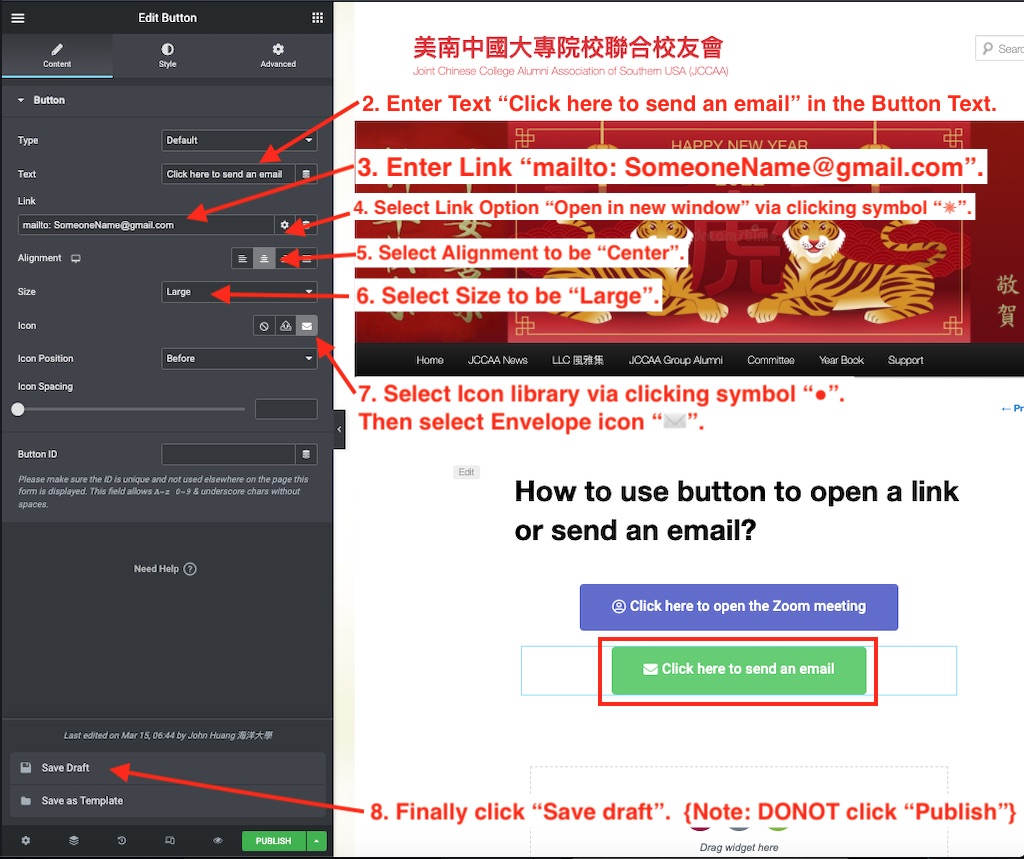
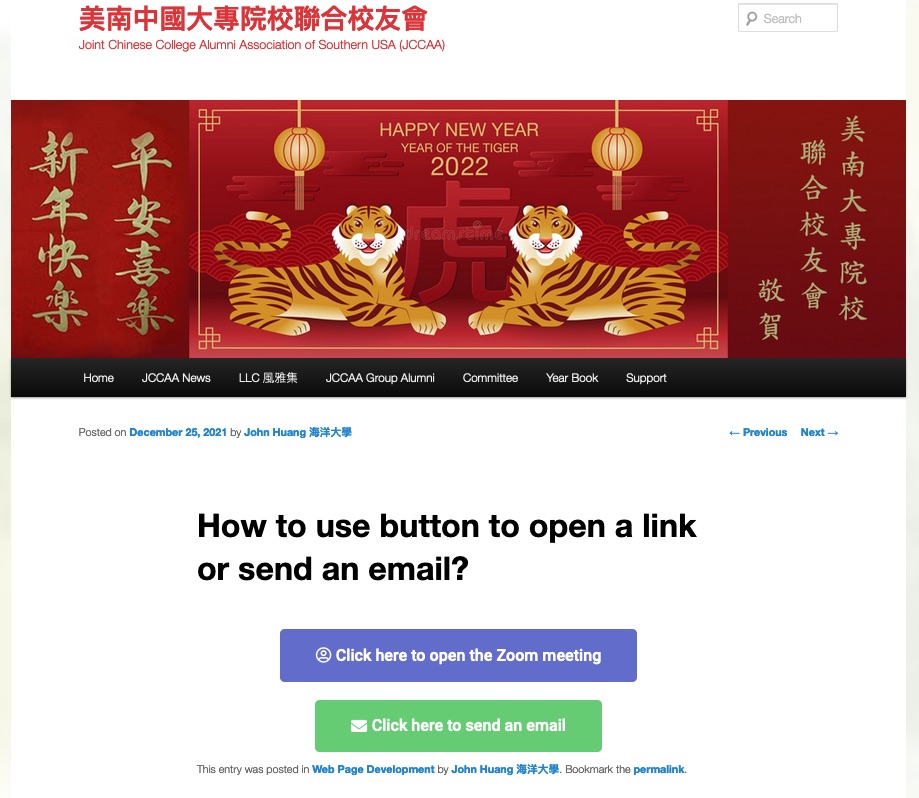
How to use "button" to open a PDF file in a new window?
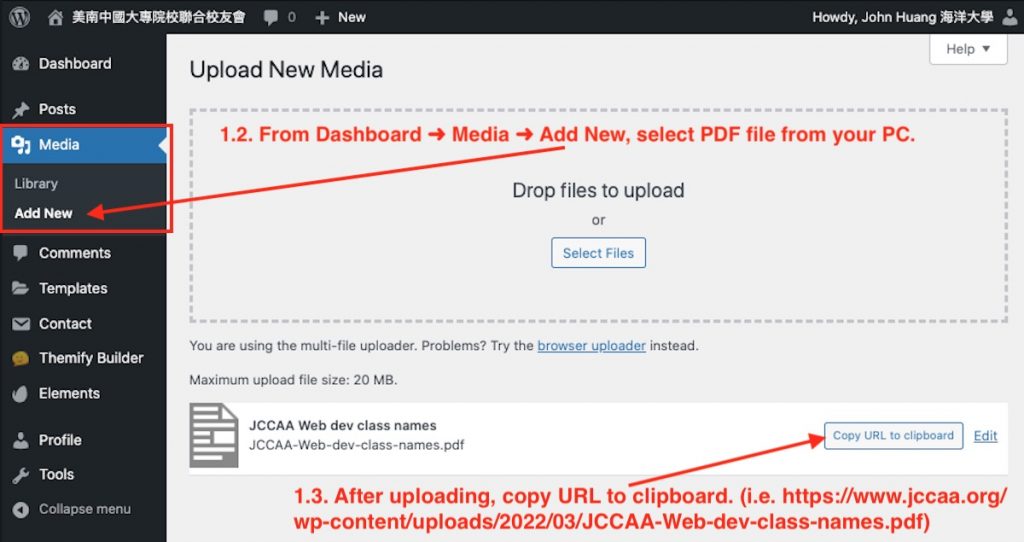
Upload your PDF file into JCCAA WordPress:
From Dashboard ➜ Media ➜ Add New, select PDF file from your PC.
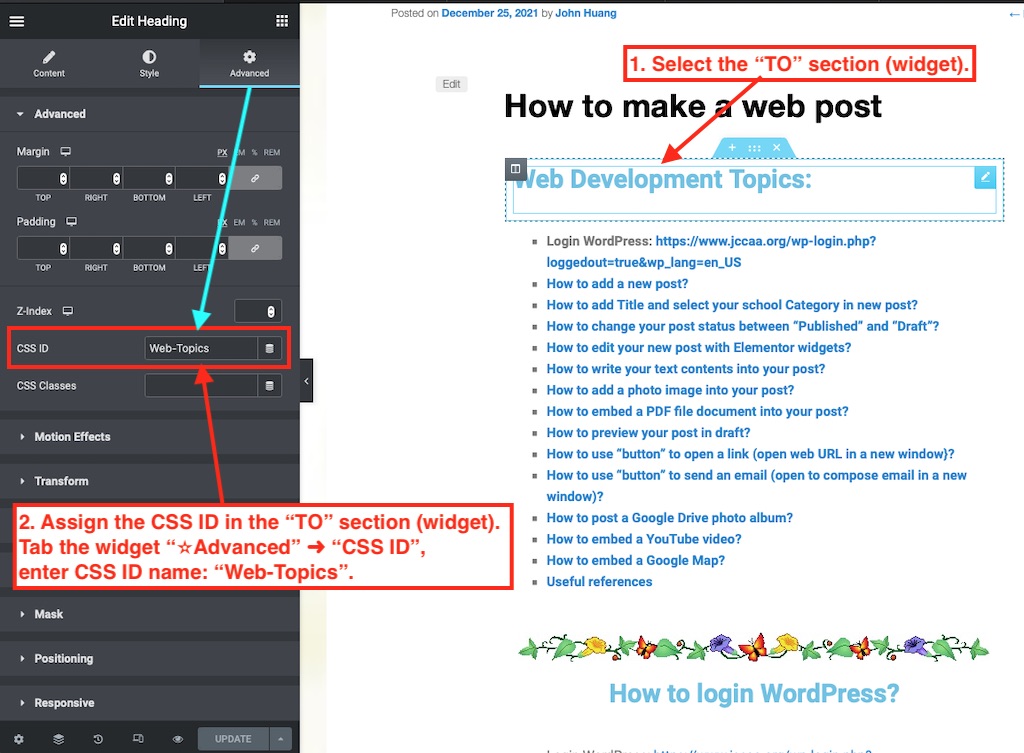
The internal anchor link is linked within the same web page. When you click on an internal anchor link in the “FROM” section (widget), you will scroll automatically to the referred“TO” section (widget) and display it on the same web page. The internal link name is followed by the hash sign(#), called CSS ID. You have to assign this CSS ID to refer section of the same web page.The following steps show how to assign CSS ID and to link to #CSS ID, using “Web-Topics” as example:
Assign the CSS ID in the “TO” section (widget). Tab the widget “✫Advanced” ➜ “CSS ID”, enter CSS ID name: “Web-Topics”.
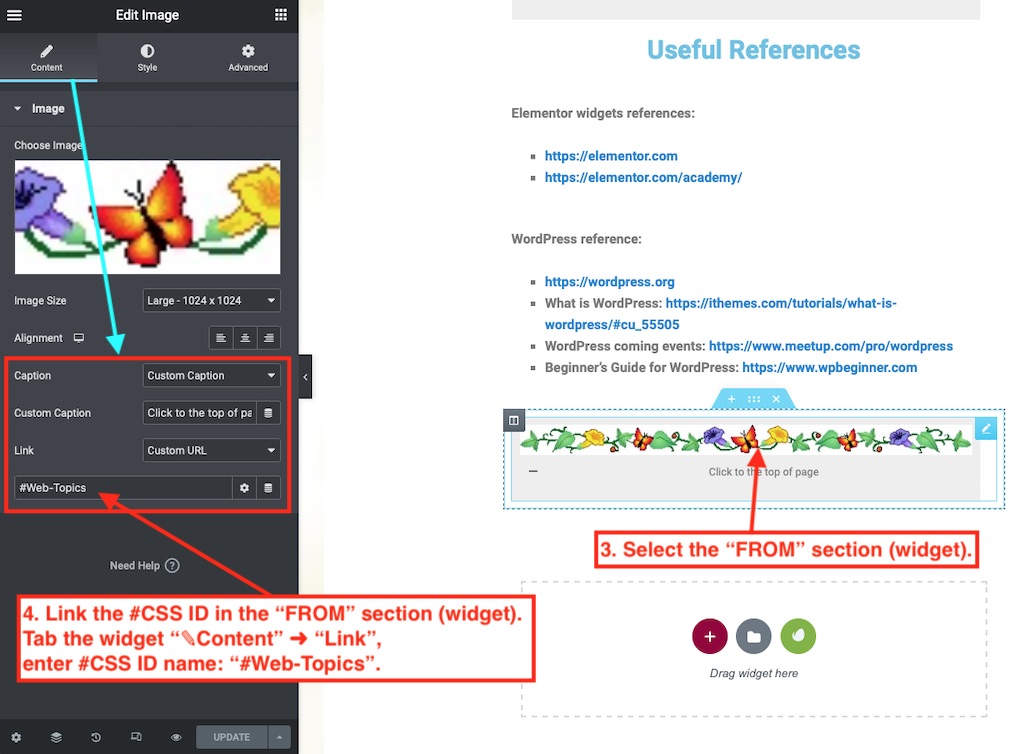
Link the #CSS ID in the “FROM” section (widget). Tab the widget “✎Content” ➜ “Link”, enter #CSS ID name: “#Web-Topics”.
Click to the top of page
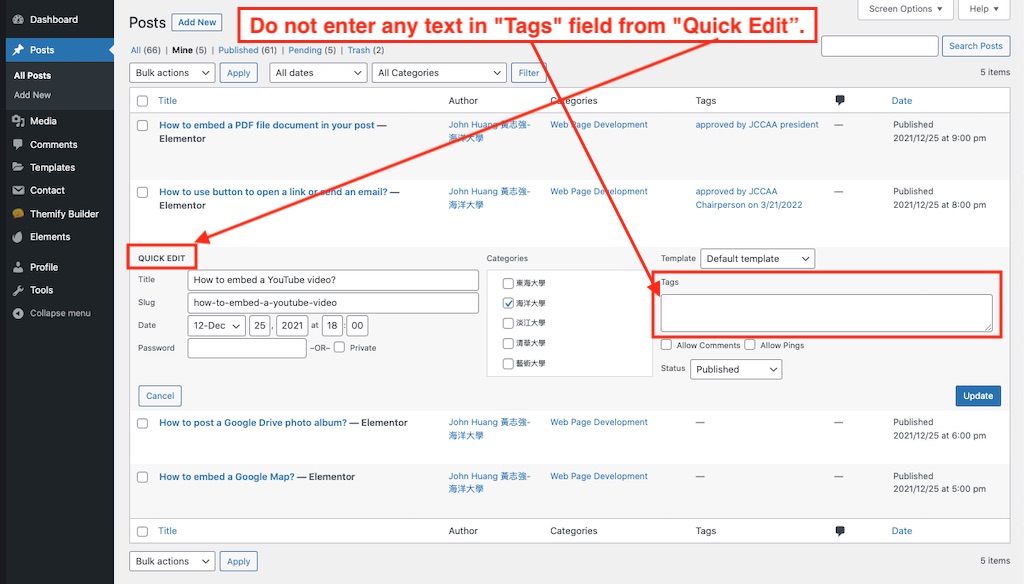
Do not change your “Nickname” and “Display name publicly as” in “Profile”. And do not enter any text in "Tags" field from "Quick Edit".
In order to recognize easily who publishes the web post, please do not change your “Nickname” and“Display name publicly as” in “Profile”.
Do not enter any text in “Tags” field from “Quick Edit”. This “Tags” field is reserved to be used by JCCAA web administrator.